|
|
|
Home | Forums |
Downloads | Gallery |
News & Articles | Resources |
Jobs | FAQ |
| Join |
Welcome !
|
3 Users Online (1 Members):
Show Users Online
- Most ever was 626 - Mon, Jan 12, 2015 at 2:00:17 PM |
Forums
|
Forums >> Revit Building >> Technical Support >> Railing Extension Problem
|
|
|
active
Joined: Wed, Aug 19, 2015
0 Posts
 |
Using Revit 2016.
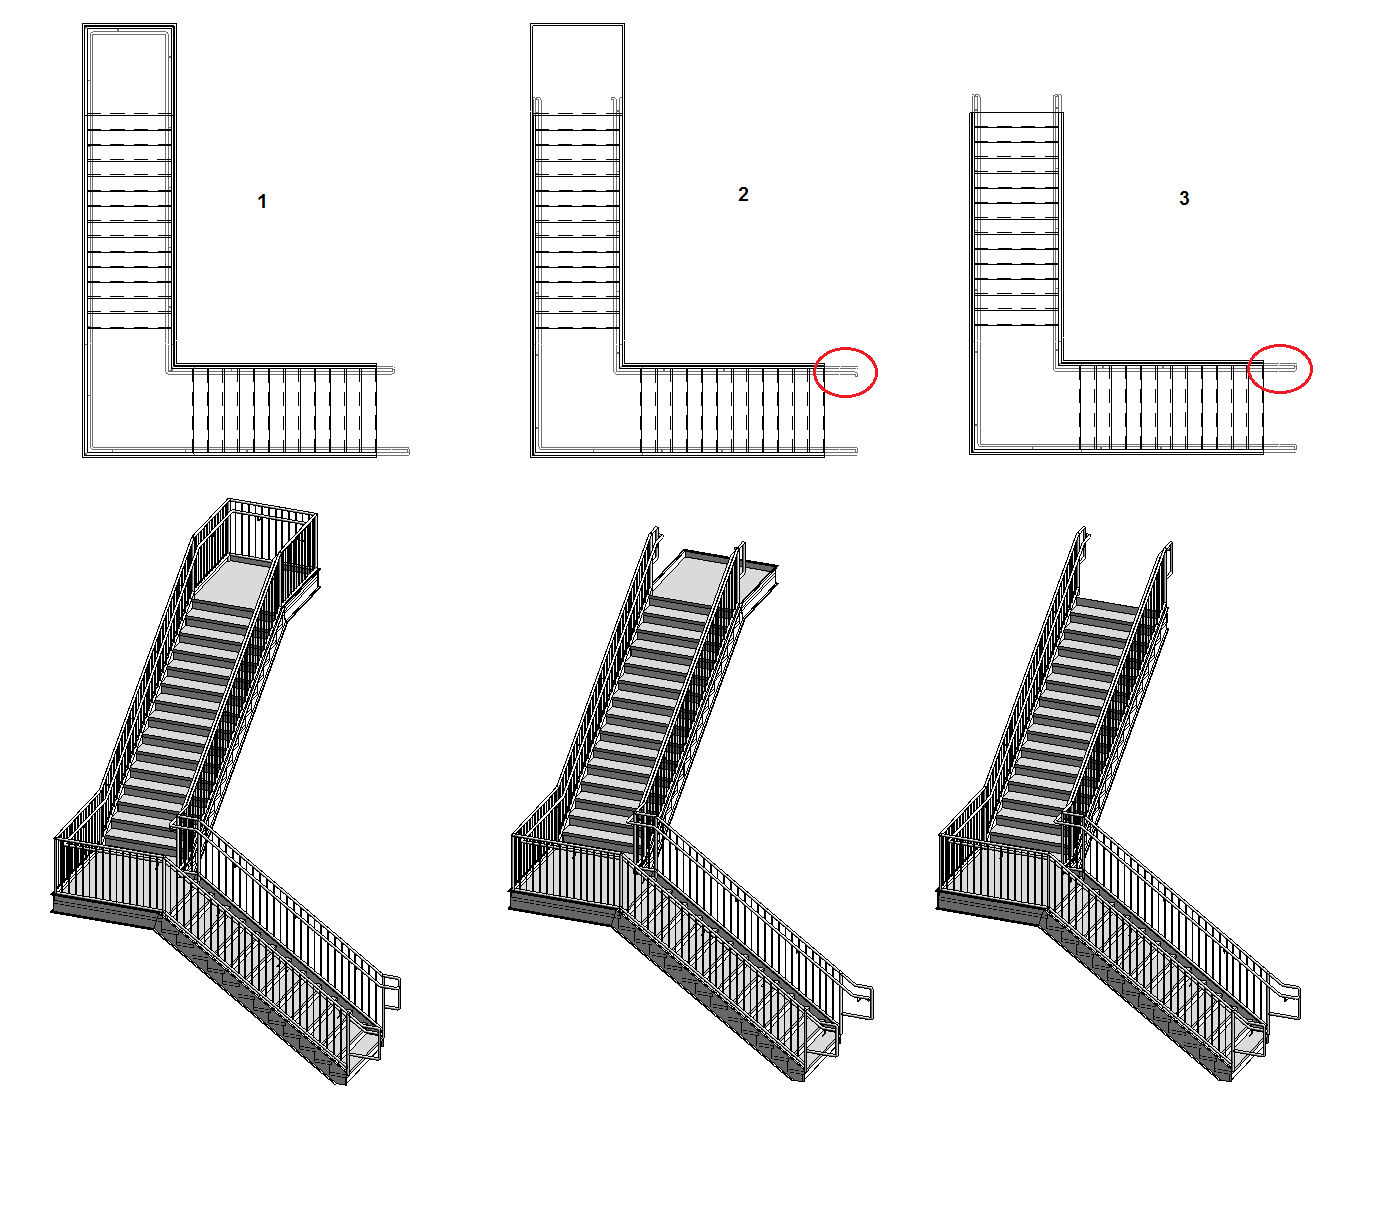
I am having a wierd issue with rail extension that extends to wall thinking that the wall is towards the center of the stair rather than the outside of the stair. This hapens when I create a stair that has a landing at the top and the railing becomes one continuous element that starts at teh bottom of the stair, goes to the top and tehn continues back to the beginning. When this happens, I will copy the railing in place and then edit the path so that I can have 2 seperate rail elements for both sides of the railing. In the Attached image, 1 is the railing as one element, 2 is the railing duplicated with path edited to create 2 railing elements, 3 is how the railing should look but the stair does not have a top landing.
In the second stair you can seee how the handrail bends away from the guard at the bottom.
In the third stair you can see how it should look.
The problem occurs as revit seems to draw railings on the host clockwise and then if you at any point the you cange the path to make the original start be at a higher elevation than the end it flips the start and end but still draws the railing clockwise instead of counter clockwise and thus the extension to wall thinks the wall is stil on the left side in this instance.
The question is does anyone know of a way to change this orientation or do I always have to make my stairs and top landing as 2 elements.
(also this canot be fixed my adding a short stair at the top and then deleting it, the railing will re draw itself incorrectly when finishing the edit.
|
This user is offline |
|
 | |
|
|
active
Joined: Wed, Aug 19, 2015
0 Posts
|
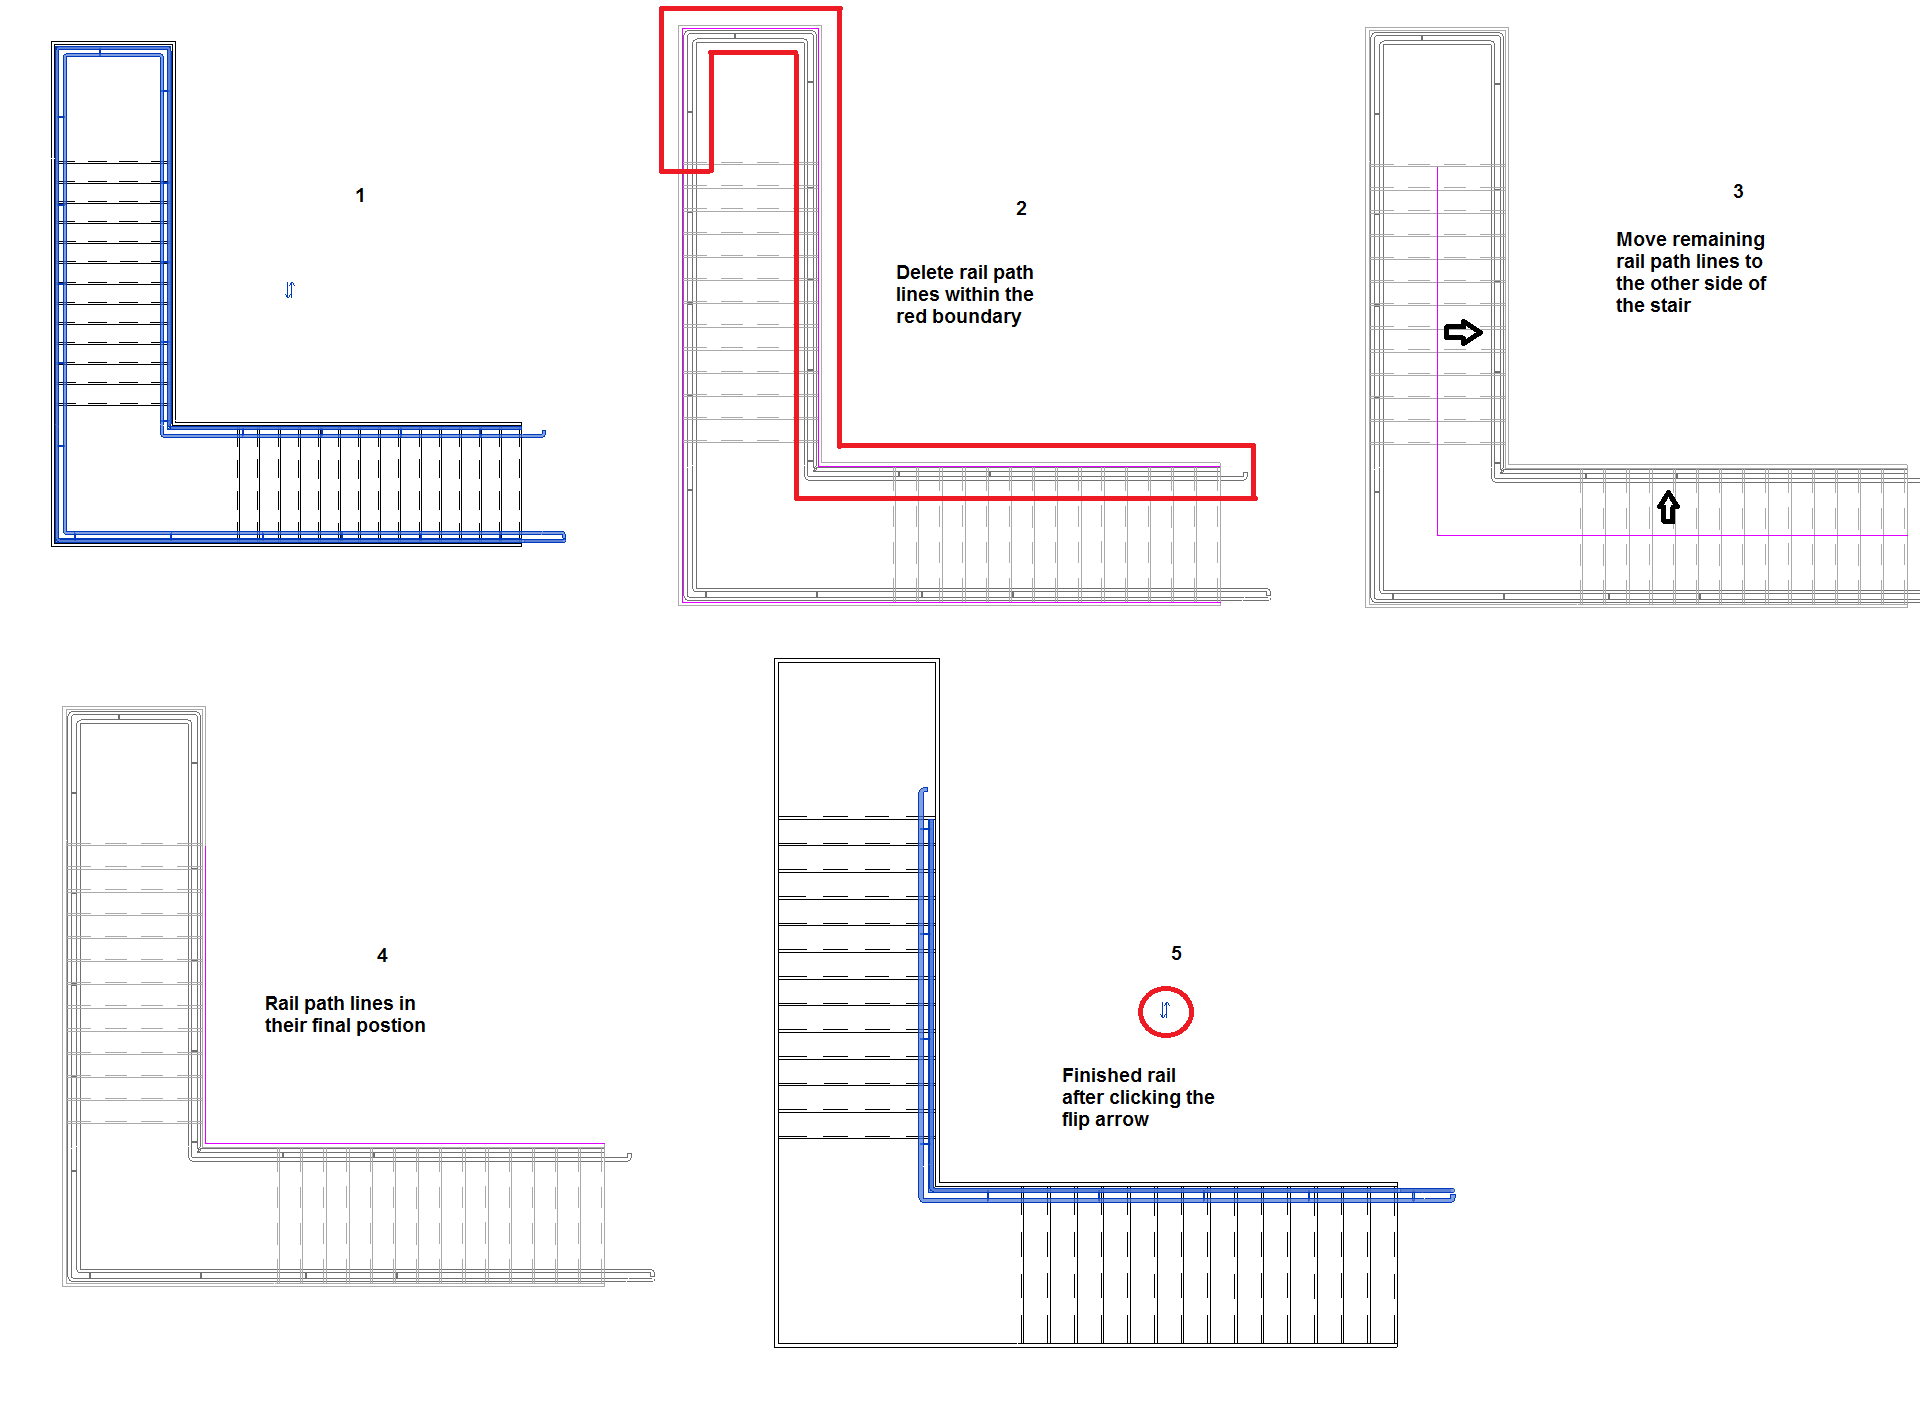
Found a workaround right after posting this. Keep the rail path lines from the side of the rail that works correctly when first placed and delete the ramaining ones. Then move the working lines to the other side of the stair and finsih sketch. Then flip the rail and you are done. See attached image for walkthrough.
|
This user is offline |
|
|
|
Similar Threads |
|
Stair railing baluster falls short on ADA railing extension |
Revit Structure >> Technical Support
|
Mon, Feb 8, 2016 at 7:38:52 PM
|
1
|
|
12" RAILING extension (Image Attached) |
Revit Building >> Tips & Tricks
|
Sat, Aug 30, 2008 at 9:53:18 PM
|
5
|
|
Railing without extension |
Revit Structure >> Technical Support
|
Fri, Oct 2, 2009 at 10:54:50 AM
|
2
|
|
Stair railing at extension in Revit 2012 |
Revit Building >> Technical Support
|
Wed, Feb 1, 2012 at 12:11:10 PM
|
4
|
|
Problem about the railing slope |
Revit Building >> Technical Support
|
Fri, Jun 25, 2010 at 1:33:49 AM
|
2
|
|
|
Site Stats
Members: | 2161655 | Objects: | 23325 | Forum Posts: | 152479 | Job Listings: | 3 |
|