Forums
|
Forums >> Revit Building >> Technical Support >> Tagging a Copy/Monitored Wall
|
|
|
active

Joined: Tue, Aug 25, 2009
0 Posts
 |
Revit 2015 - question about tagging walls that are copy / monitored.
We have copy/monitored structural shear walls, flood walls, and columns. We then apply an exterior wall which is basically veneer, airspace, and insulation. Then on the inside of the structural wall we apply a 3rd wall type that is a stud and gwb.
How do you guys typically tag these walls? there are 3 possible tags, but we want our wall types rolled into 1 wall type. the only work around i have found, is to pick the interior wall and tag it. Then on our wall type legend we add the other walls to it. I'm not sure if this is how other people do it or not, it's just our work around to the problem.
How do you deal with tagging walls that are copy/monitored?
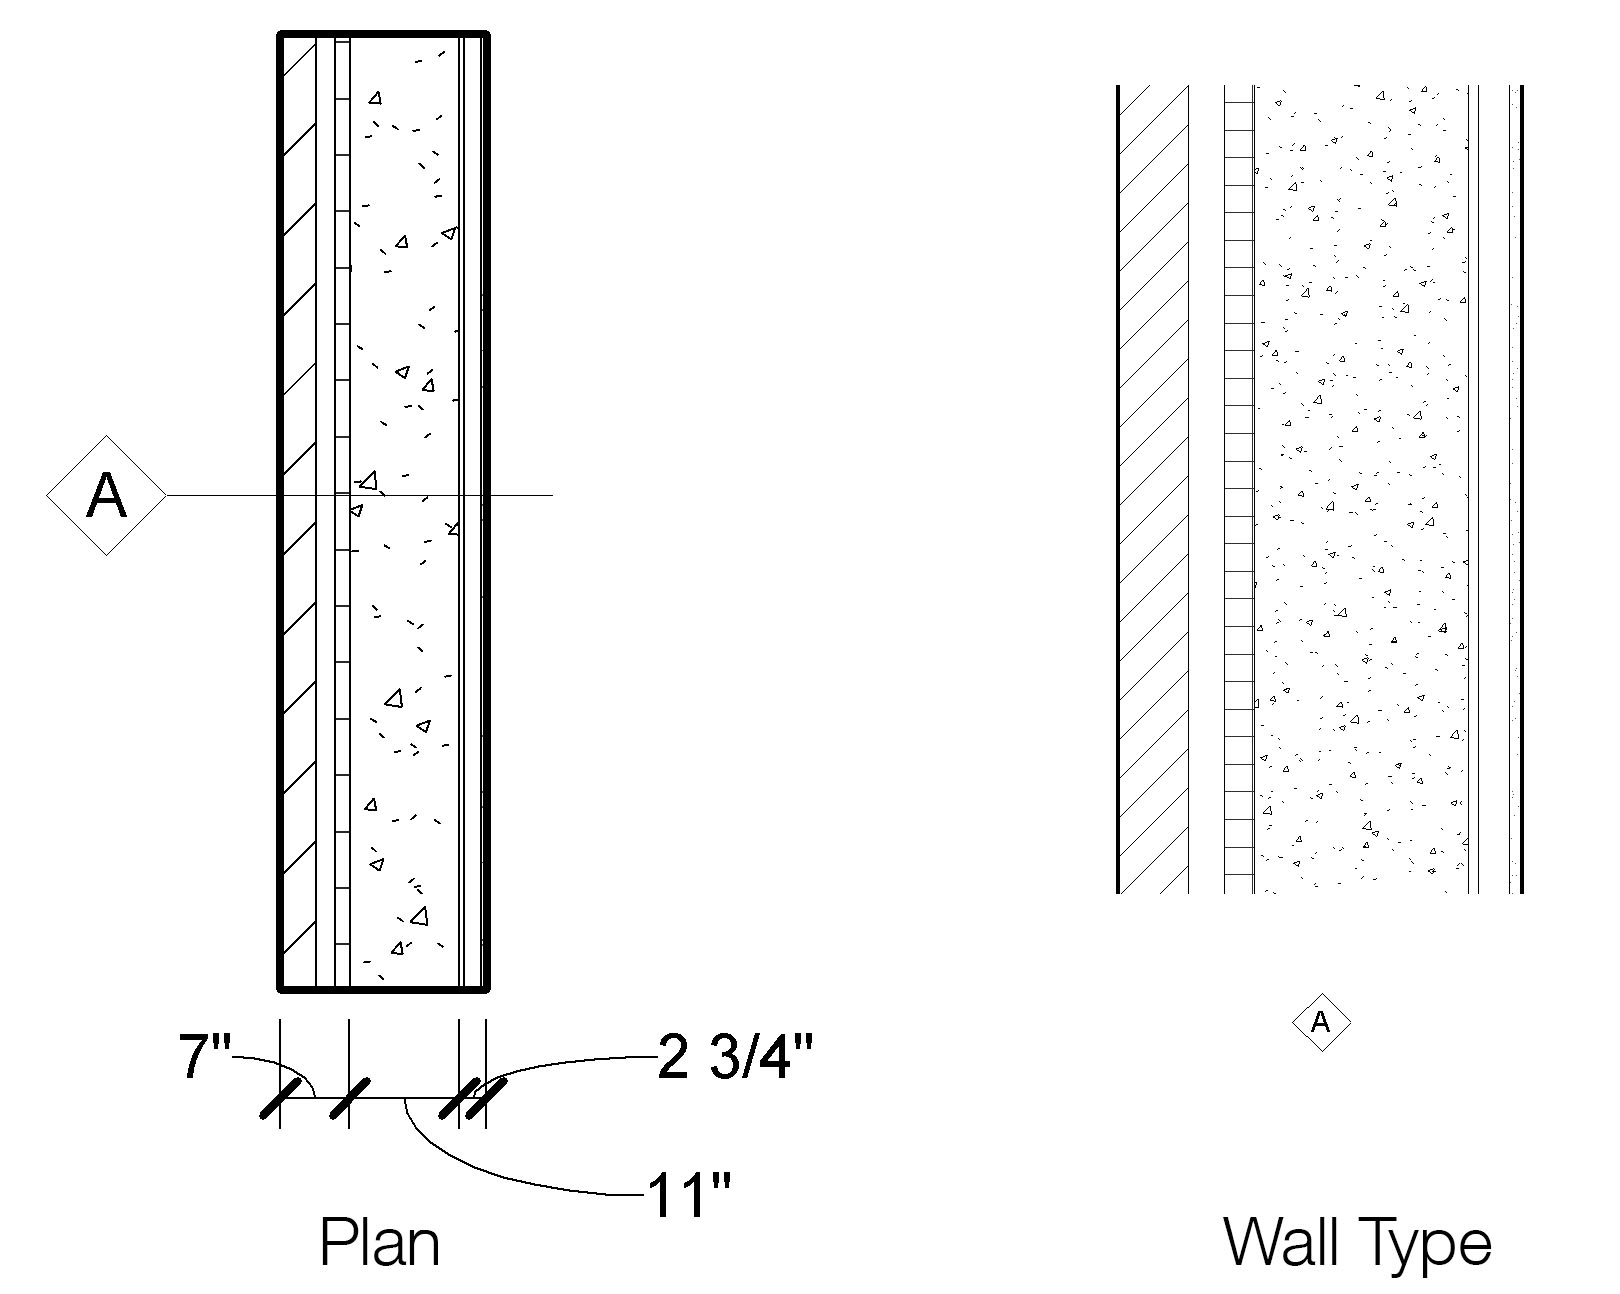
Attached is an example. (both JPG and RVT)
Thanks for your input.
|
This user is offline |
View Website
|
 | |
|
|
site moderator|||
Joined: Tue, May 16, 2006
13079 Posts
 |
Blue, I assume you are A - not E. Why are you using the engineer's wall definition? When you C/M, you have a choice and you can use your own wall type which would be the usual complete wall with interior and exterior skins?
|
This user is offline |
|
|
|
active
Joined: Tue, Aug 25, 2009
0 Posts
|
WWhub - yes, I work in an arch office. After doing some reading up on the copy/monitor process, i was left with the understanding that the wall centerline (not the core centerline) is how the walls are located. Once we added Exterior finishes, and gyp/insulation/studs on the interior the wall centerline changes and throws off the copy/monitor process.
Perhaps I misunderstood the workflow?
man. if i did (and it sounds like i did) i really made alot more work for myself.
*edit*
To add to that - we're using the enegineer's wall definitions because this is a huge project with alot of structural coordination that is partially post tension, partially a parking deck, and partially poured in place. There are shear walls all over due to the height and a 13' flood wall that wraps the first floor and has to be burried within the archtiectural stuff. At the time, we felt with all the walls moving it was easier for us to c/m the concrete. Maybe it was a bad choice.
Edited on: Tue, Jun 21, 2016 at 8:03:36 AM
|
This user is offline |
View Website
|
|
|
site moderator|||
Joined: Tue, May 16, 2006
13079 Posts
|
Blue,
You did figure out how to use the C/M process by following the Help shown below but using archiectural wall?
- Copy the walls for monitoring, as described in Copy Elements for Monitoring. During that process, set options for the walls to copy (Step
 , as described in Specify Options for Copy/Monitor. , as described in Specify Options for Copy/Monitor.
- If the walls have the reverse orientation (interior/exterior), select a wall and use the flip control or press the space bar to change its orientation. See Flip Controls.
- Stop monitoring the walls.
- Select the walls and, on the Properties palette, change the wall location line to Core Centerline.
- Change the wall type to the appropriate structural core wall type.
- Monitor the walls in the linked model.
|
This user is offline |
|
|
|
active
Joined: Tue, Aug 25, 2009
0 Posts
|
My process was to use copy/monitor and copy the objects in. I never stopped monitoring them (or any of the steps after that). If i tried changing walls it caused me problems.
I see the trick is to copy/monitor them in. stop the monitor, change to the correct wall type with the same core thickness (assign the wall core centerline alignment), then re-monitor them with a matching core. I get it now.
So if i needed to say add an extra layer of GWB the wall, I'd need to stop monitoring it, add the GWB, then re-monitor it every time? When i tried it using a dummy test file i got a wall centerline error. So I’m assuming that the process is to constantly start/stop monitoring it.
Thank you very much.
|
This user is offline |
View Website
|
|
|
site moderator|||
Joined: Tue, May 16, 2006
13079 Posts
|
I don't believe you have to change the monitor for that but you will have to test it to be sure. Just two simple test projects with one wall.
|
This user is offline |
|
|
|
active
Joined: Tue, Aug 25, 2009
0 Posts
|
I'm sorry, i was not clear. I did try it. I tested it twice in fact to make sure i wasnt making a mistake that i could see. This was the result i expierienced. Once i run the coordination review on it, revit states my wall centerlines were not matching up. If i told it to align them again, it moves the wall and the cores are no longer in alignment.
the only way i can see it working is i constantly stop and start the monitoring process on the wall.
|
This user is offline |
View Website
|
|
|
site moderator|||
Joined: Tue, May 16, 2006
13079 Posts
|
Wow - That's not good. I suggest you post this on the autodesk site so they can include it in future work. This should work without all of this effort.
|
This user is offline |
|
|
|
active
Joined: Tue, Aug 25, 2009
0 Posts
|
I'll do that.
I went ahead and loaded up revit 2017 and it works the same way. all i had to do was remove some CI and shave down the air space and the whole wall reported it needed to be re-aligned to match the core of the linked monitored wall.
Thanks for taking the time to provide some feedback.
|
This user is offline |
View Website
|
|
|
Similar Threads |
|
Tagging Materials on Objects that are Copy/Monitored |
Revit Building >> Technical Support
|
Wed, Jul 16, 2008 at 2:50:54 PM
|
0
|
|
Wall Footing for copy monitored element. |
Revit Structure >> Technical Support
|
Tue, Jan 22, 2008 at 4:25:40 PM
|
2
|
|
Copy/Monitor walls |
Revit Structure >> Technical Support
|
Tue, Apr 2, 2013 at 10:14:23 AM
|
2
|
|
Copy Monitor Floors with Openings |
Revit Building >> Technical Support
|
Fri, Mar 28, 2014 at 11:56:55 AM
|
0
|
|
Copy and Paste Elements from Linked Models is Easy ! |
Revit Building >> Tips & Tricks
|
Thu, Jul 4, 2019 at 4:23:18 PM
|
2
|
|
|
Site Stats
Members: | 2161655 | Objects: | 23325 | Forum Posts: | 152479 | Job Listings: | 3 |
|