Forums
|
Forums >> Revit Building >> Technical Support >> Cut Parts of a Wall
|
|
|
active
Joined: Fri, Feb 12, 2016
0 Posts
No Rating |
Hi all, Im a revit beginner.
1-I have this call out where i want the GWB and CMU to stop at the ceiling and then continue at the top of the second floor. i tried to cut it with the cut profile tool but it gives my an error "Ends of the sketched loop do not lie on the boundary of the face being modified". i tried the tool on different part of the model it works, just not here.
2- also how can i show GWB wrapping around the window opening, on all sides. on the image the yellow should be GBW. i tried checking the wrap option on the wall structure but it did not work.
here is a image of it
-https://imgur.com/te0QVyL
Edited on: Tue, Jun 14, 2016 at 10:59:58 AM
|
This user is offline |
|
 | |
|
|
active
Joined: Tue, Oct 11, 2011
0 Posts
No Rating |
If I understand what you are trying to do:
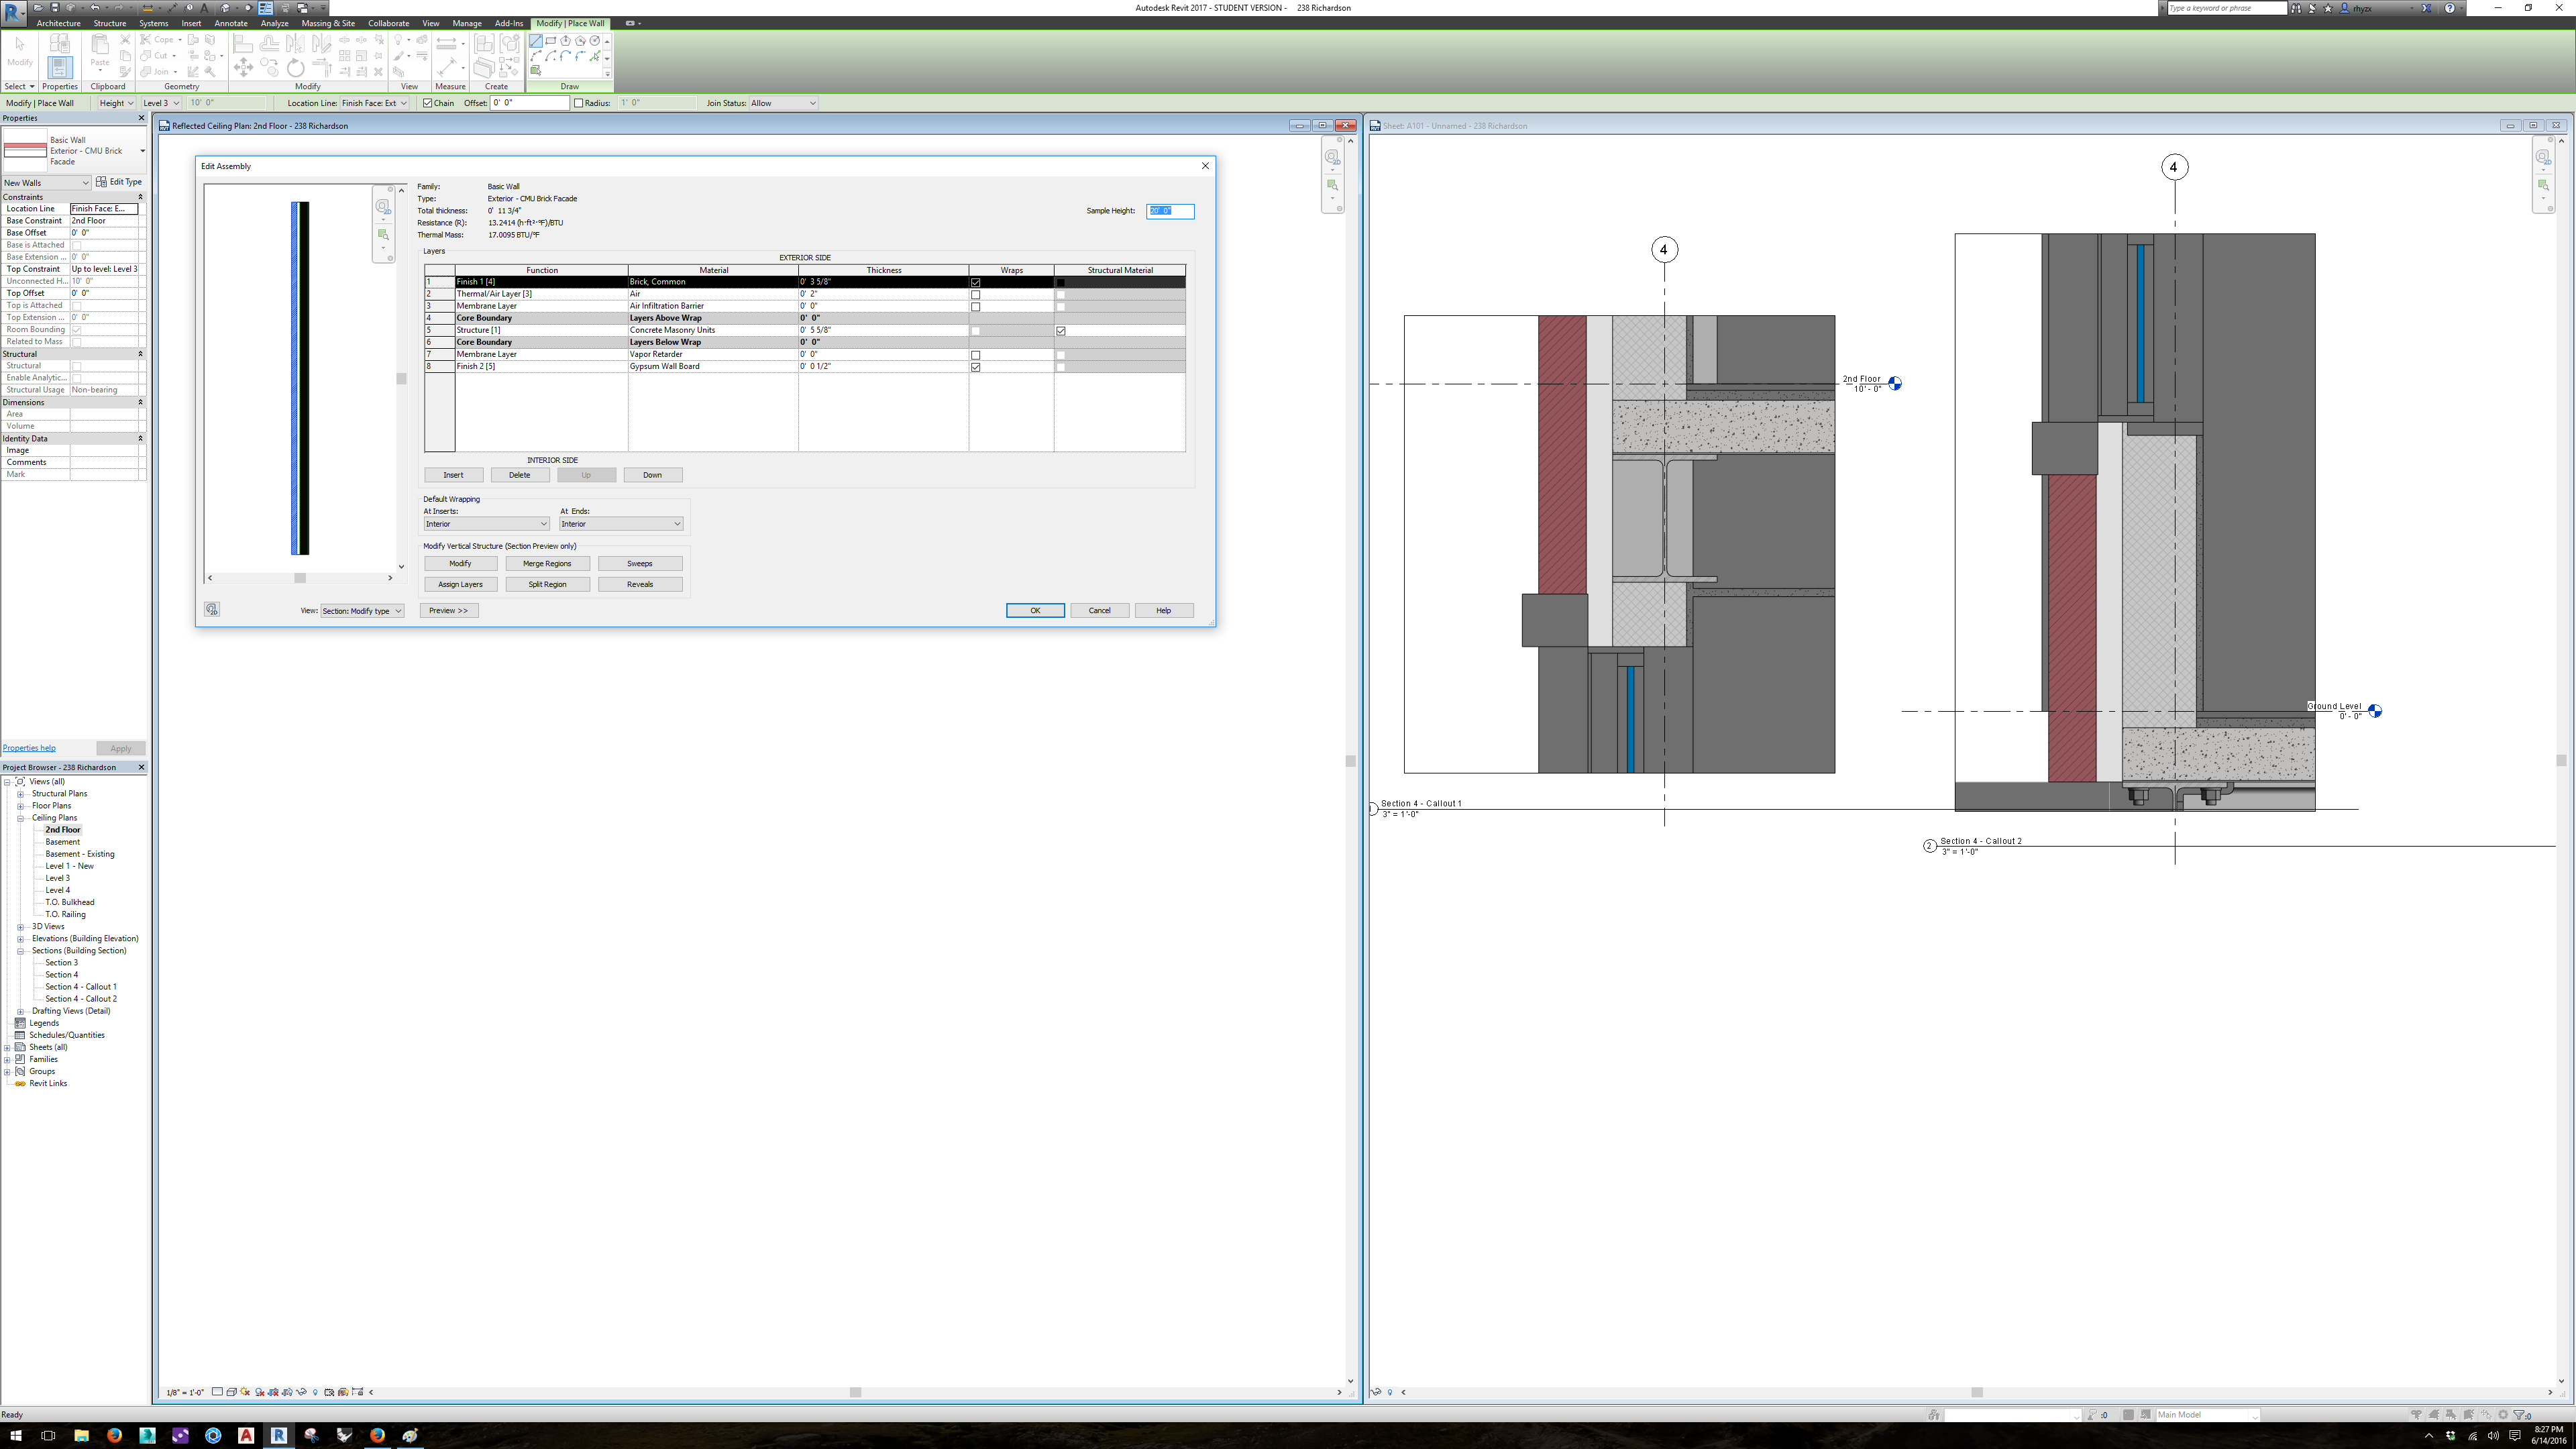
1. To get the wall to end below the steel beam but the brick to continue to level 2, I would recommend using the top extension distance parameter. To enable this parameter for your wall, you need to select your wall, go to "edit type", click on "edit..." under the "constraints, structure" parameter, change the preview to "section: modify type attributes", click on "modify" under "modify vertical structure." Zoom in on the top of your wall assembly preview and choose the segment representing the top of the brick veneer. You should see a closed blue padlock. Click on the padlock to open it. Now you can set the top of the wall to be the beam bearing height, and add a top extension distance which will extend only the veneer past the beam to level 2.
This will only work if you model the exterior wall in single level slices, and not if the exterior wall extends the full height of the building, but I do not recommend modeling the exterior that way anyway, since it causes significant problems resolving wall joins.
2.To get the gyp to wrap the head, sill, and jamb of the window, you need to go to "edit type" and change the parameter "wrapping at inserts" to "interior" AND you need to ensure that the gyp layer is on the interior side of the core boundary of your wall assembly. Revit wraps layers exterior or interior of the core boundaries only.
|
This user is offline |
|
|
|
active
Joined: Fri, Feb 12, 2016
0 Posts
No Rating |
- thanks for the help as you can see on the attached images i was able to break the different layers at each level.- i still cant get the gwb to wrap around my openings. if you look at the images you'll see that even after changes the wall settings it did not affect the wrapping.which method for creating walls do you recommend? walls that extend across multiple levels or walls that begin and end at each level?
|
This user is offline |
|
|
|
active
Joined: Tue, Oct 11, 2011
0 Posts
No Rating |
Hello again,
After checking some of our own families, I can see some are wrapping and some are not, even in the same wall assembly. I suspect that it has something to do with the families themselves, something like the "wall closure" parameter or another system parameter for openings, but I can't find the culprit. Maybe you can experiment with another window family?
I would recommend walls that begin and end on each level. I have had problems in the past with Revit trying to resolve multiple walls on different levels joining with one wall crossing multiple levels, and Revit cleaning only one of the wall joins, or having trouble modifying the join condition when Revit joins them incorrectly, say, in the wrong order. The more complex the wall joins become the more difficult they are to control. Doubtless someone else on here will disagree with me, but I like to keep my wall joins as simple as possible, because if Revit can chose the wrong way to something, it probably will.
|
This user is offline |
|
|
|
Similar Threads |
|
Parts v cut profile |
General Discussion >> Revit Project Management
|
Wed, Feb 8, 2017 at 11:01:08 AM
|
1
|
|
Is it possible to tag wall info from the original wall, when a walls in parts |
Revit Building >> Tips & Tricks
|
Wed, Mar 1, 2017 at 4:40:20 AM
|
10
|
|
Cut parts from roof |
Revit Building >> Technical Support
|
Thu, Apr 29, 2010 at 9:43:03 AM
|
8
|
|
Excluded parts from wall still showing in floor plan after excluded |
Revit Building >> Technical Support
|
Mon, Jun 22, 2015 at 4:11:29 PM
|
0
|
|
Section cut lines |
Revit Structure >> Technical Support
|
Tue, Feb 2, 2010 at 9:44:41 AM
|
1
|
|
|
Site Stats
Members: | 2161655 | Objects: | 23325 | Forum Posts: | 152479 | Job Listings: | 3 |
|