Forums
|
Forums >> Revit Building >> Technical Support >> Roof and constructional roof beams!!
|
|
|
active
Joined: Fri, May 21, 2004
135 Posts
No Rating |
Hi all,
I am dealing with a complex roof that is based on wooden beams each 610mm, with in the ridges [corners] steelprofiles, these beams support anunderlayment with on that roof tiles on smaller profiles.
I started to create the roof with the roofing tool, but I never could detail the roof better thenjustthis "mass".
My question is; is there a way to populate the initial created roof with structural elements in a parametric sense?
at the moment my roof is underdetailled compared to the rest!
hinge: the way we can modify the vertical structure of a wall, could this work for roofs aswell? respecting the roofs slope angles, so each sloped part of a roof should individually be populated with structural parts.
or did I miss this tutorial maybe?
E
p.s. is there aswell a way, not only to hatch, but aswell to array roof tiles on the created roof with there support?
|
This user is offline |
|
 | |
|
|
site moderator|||

Joined: Mon, Mar 14, 2005
777 Posts
 |
elvis, it is not possible to create a "structural element" roof just yet out of the box, sounds like you have a very complicated roof and I wont be spending my time modeling each and every component. what you can do maybe is to array some beams on a plane to a point, don't waste time on hip corners...
you can use the "beam system" under your structural tab and set the roof sheet (say 40mm metal sheet) as your plane.
HTH just yell if you need more help but this should put you on the right path...
-----------------------------------
Integrator Architectural Engineering Construction KarelCAD |
This user is offline |
View Website
|
|
|
active
Joined: Fri, May 21, 2004
135 Posts
No Rating |
thnxs eldados,
I think this could be a wish-list item, because the wall property's d go way beyond the roof property's and so to say, each project does have a roof doesn' it.
I am fed up with the vertical structure properties of the wall types, like integrating ringbeams in the core of the wall. I just wondered if doing the same was possible to create roof beams like rafters. nog I just can layer a certain distance, for example the height of the rafters but leave this space empty, so a lack of information. I just can reserve the space for constructional elements.
whish list items:
- while generating the default roof scape: create automatically reference planes according to the slope of all roof parts.
- create automatically labelled dimensions with the width, height etc.
- and prepare array possibilities to populate the roofmodel with structional elements, like rafters, hip rafters, roof tiles arrays + support
|
This user is offline |
|
|
|
site moderator|||
Joined: Mon, Mar 14, 2005
777 Posts
|
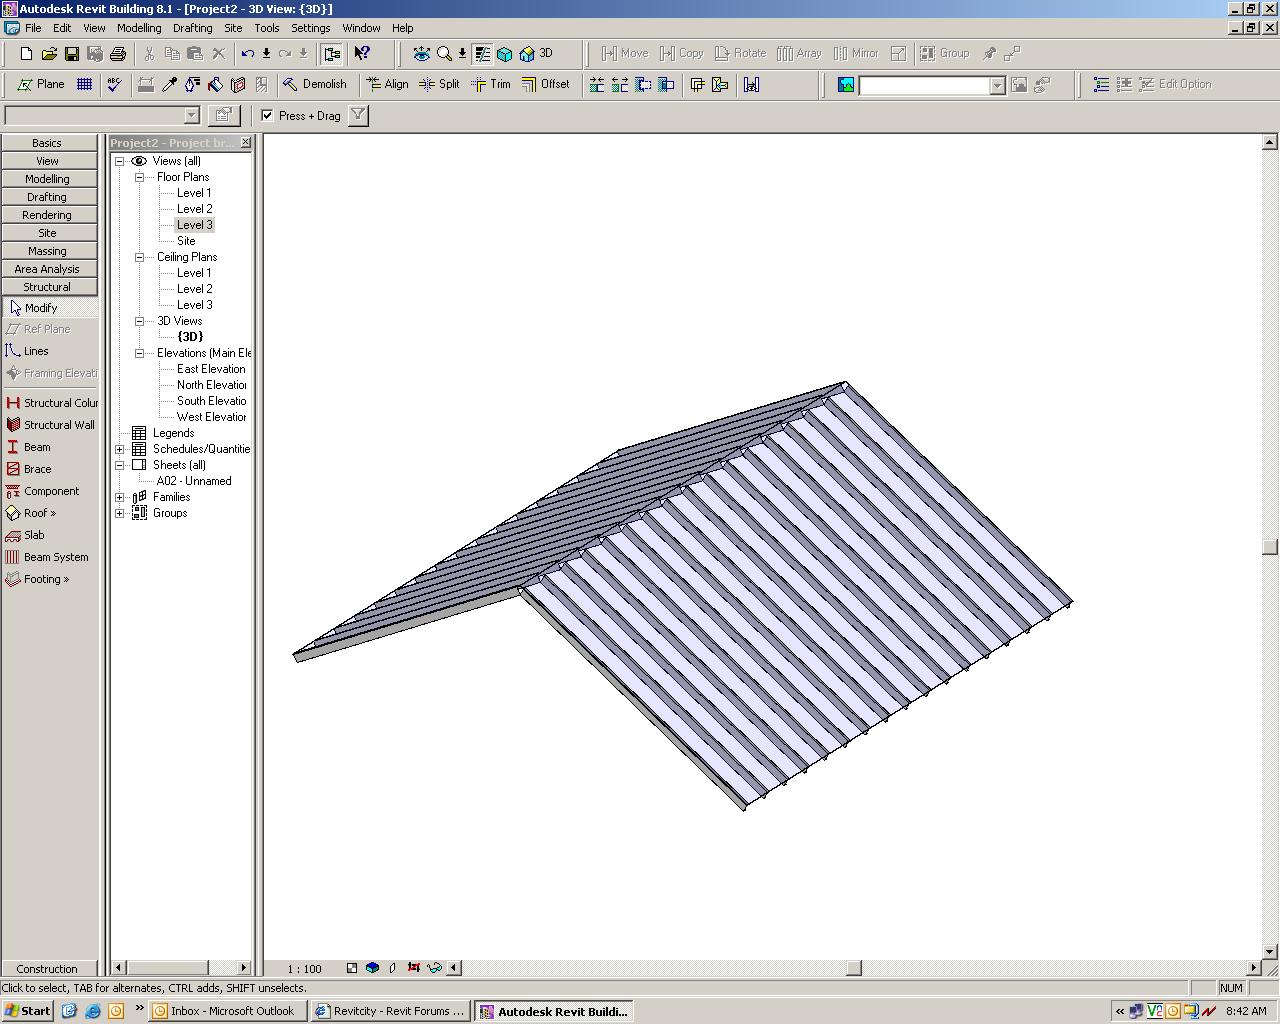
like I said, you can use the beam system and you might be surprise what you can do with it  i have attached a quick image of what I mean, (very quick)
-----------------------------------
Integrator Architectural Engineering Construction KarelCAD |
This user is offline |
View Website
|
|
|
active
Joined: Fri, May 21, 2004
135 Posts
No Rating |
thnxs,
curious as i am, but the image won't download at the moment!
i will try later again
grtz
E
Post edited on 2006-04-13 08:12:55
|
This user is offline |
|
|
|
Similar Threads |
|
Canted beams (vertical axis following roof) |
Revit Building >> Technical Support
|
Mon, Jul 24, 2006 at 10:35:44 AM
|
2
|
|
ROOF HIDING ROOF BEAMS! DANGEROUS SITUATION THAT AUTODESK ISN'T ADDRESSING! |
Revit Structure >> Technical Support
|
Thu, Dec 6, 2012 at 1:48:10 PM
|
7
|
|
crickets for complex roof w/ multi slopes attached to beams |
Revit Building >> Technical Support
|
Fri, Aug 1, 2008 at 3:13:45 PM
|
7
|
|
should roof rafter on top of the roof or under the roof. |
Revit Structure >> Technical Support
|
Tue, Jul 28, 2009 at 12:41:36 PM
|
5
|
|
Extreme Slope at Roof Edge After Attaching Roof to Beams Using "Pick Supports" |
Revit Building >> Technical Support
|
Fri, Sep 28, 2012 at 11:58:23 AM
|
2
|
|
|
Site Stats
Members: | 2161655 | Objects: | 23325 | Forum Posts: | 152479 | Job Listings: | 3 |
|