|
|
|
Home | Forums |
Downloads | Gallery |
News & Articles | Resources |
Jobs | FAQ |
| Join |
Welcome !
|
7 Users Online (5 Members):
Show Users Online
- Most ever was 626 - Mon, Jan 12, 2015 at 2:00:17 PM |
Forums
|
Forums >> Revit Building >> Technical Support >> Need a help
|
|
|
active
Joined: Tue, Sep 2, 2014
0 Posts
No Rating |
hi every one
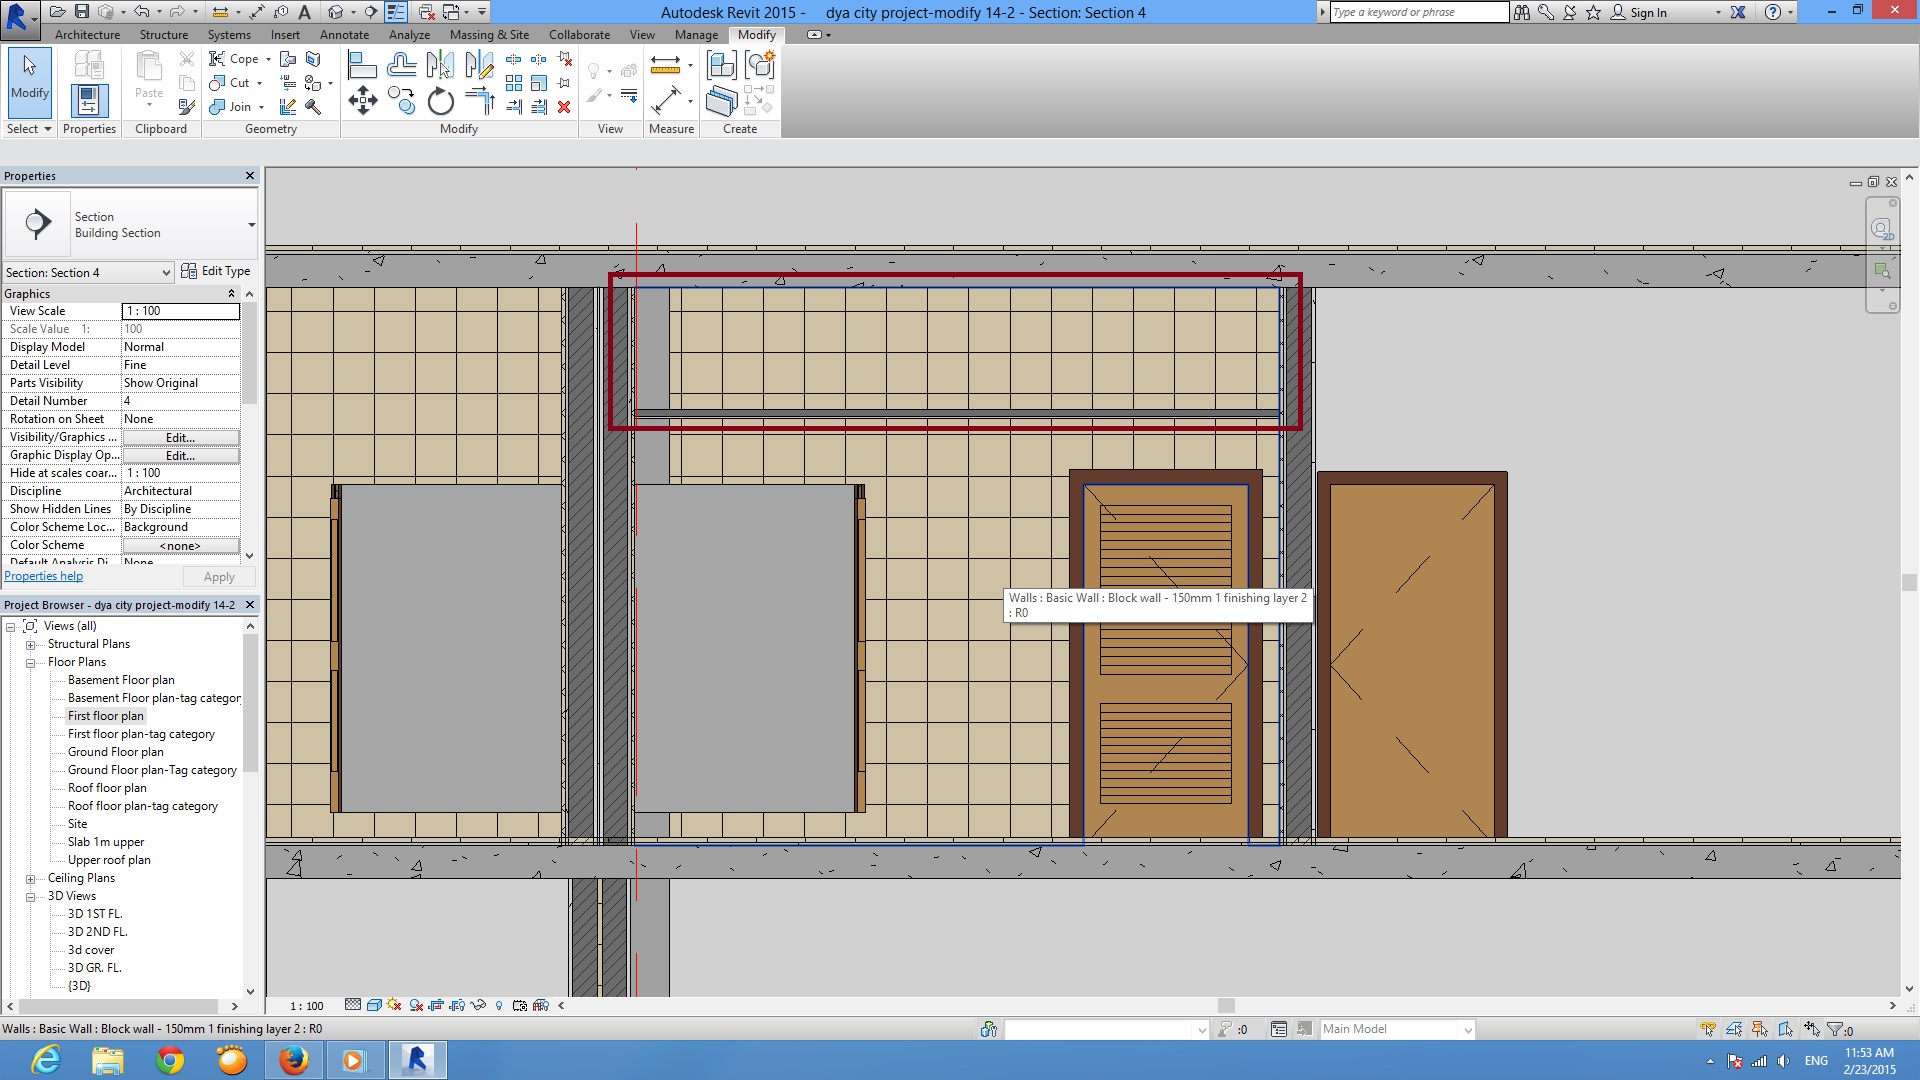
can i modify the wall tiling height & make it below the celing level or not
as show below in picture
regards
|
This user is offline |
|
 | |
|
|
active
Joined: Tue, Sep 2, 2014
0 Posts
No Rating |
i used Split face option but it doesnt work here....
|
This user is offline |
|
|
|
site moderator|||
Joined: Tue, May 16, 2006
13079 Posts
 |
You have a couple of options here. You can use a veneer wall or you can unlock the tile layer and pull it down. Here is the unlock process:
http://help.autodesk.com/view/RVT/2014/ENU/?guid=GUID-93F44C38-8158-4F7D-94E3-C076E1367786
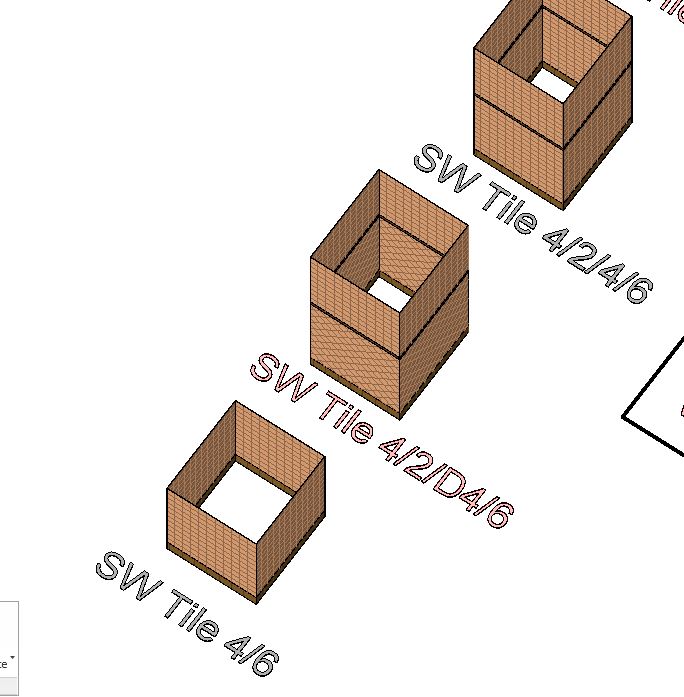
My preference is to use the veneer wall. The veneer wall is a thinn wall paced against you main wall and joined with it. When you join it, all objects, like doors, that cut the main wall will cut the joined wall. Look at the image below. This is part of one of my library resource projects. I have created several different wall types that have different pattern tile walls with tile base and wainscot tile. These are grouped together in a small square. In the lower image, the tile is 4x4 over a 6" base. The next one is 4x4 over a 2" wainscot over a diagonal 4x4 over a 6" base. Very easy to change the patters just by changing the materials.
To use we simply copy paste the group into the middle of or bath, then ungroup and align the thin walls to the bath walls and join them....DONE! Because the walls are joined on the ends, the 'box' expands to fit the bath. If you have any wing walls or strange shape, you may have to place addition wall segments but everything is already defined.
|
This user is offline |
|
|
|
active
Joined: Tue, Sep 2, 2014
0 Posts
No Rating |
WWHub its very kind of u to answer my question thanks alot
but can u plz tell me how can i attach a wall to another wall
what should i do with that & which kind of wall shall i use for tilling (thin wall like interior partition or another kind as u mention-veneer wall-where can i find this wall ?
best regards for u & i appreciate all your advice to me
many thank for you again....
|
This user is offline |
|
|
|
site moderator|||
Joined: Tue, May 16, 2006
13079 Posts
|
Walls are system level. You can copy from project to project or define them in a project. So, simply add a new wall type that has only one layer, your tile. If you want a base and/or a wainscot tile, you will need to add split areas in the wall type. Read about that here:
http://help.autodesk.com/view/RVT/2014/ENU/?guid=GUID-50482AF3-42C3-4993-A7B5-EB3E1C17FAE1 and better yet - watch this video.
https://www.youtube.com/watch?feature=player_embedded&v=VyskBfltYRg
Place this wall against your base wall then pick join from the modify tab and then the two walls.
|
This user is offline |
|
|
|
active
Joined: Tue, Sep 2, 2014
0 Posts
No Rating |
WWHub i get it now
thank you so much sir & have a nice day
|
This user is offline |
|
|
|
|
Site Stats
Members: | 2161655 | Objects: | 23325 | Forum Posts: | 152479 | Job Listings: | 3 |
|