Forums
|
Forums >> Revit Building >> Technical Support >> Applying material to extrusion
|
|
|
active
Joined: Thu, Jul 17, 2014
0 Posts
No Rating |
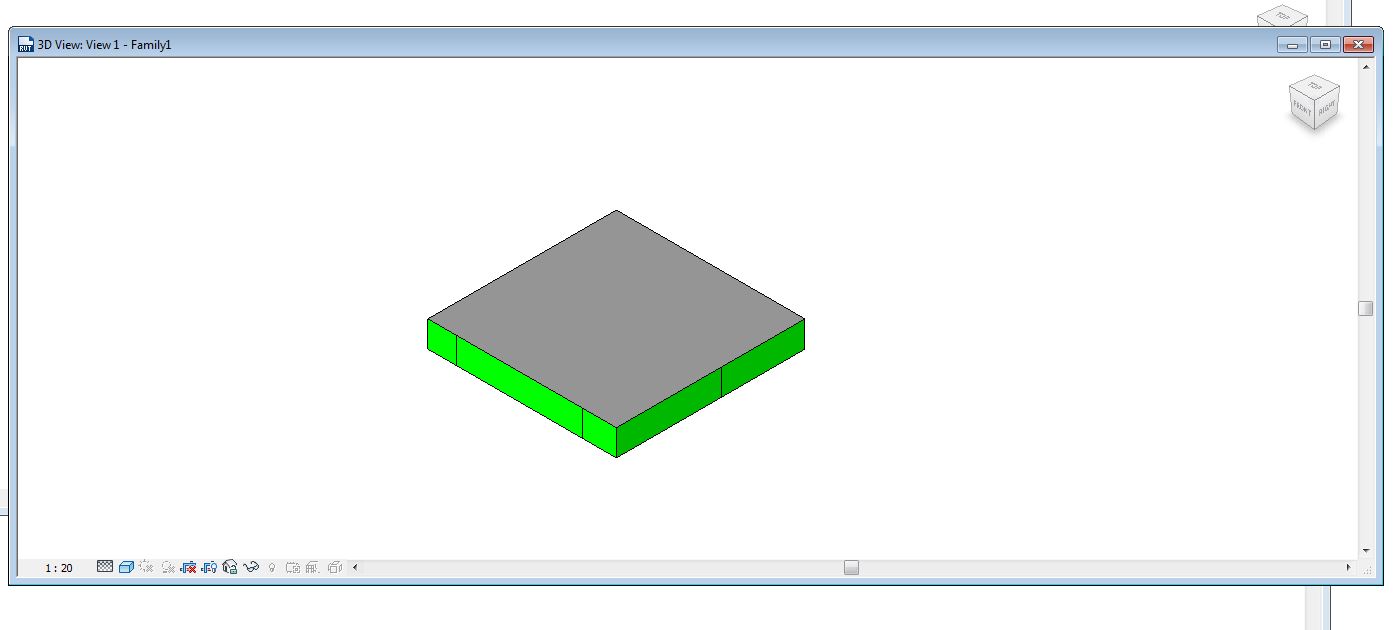
I have made an extrusion and applied a material to it. However the material won't show in plan view. It is on all other faces when viewd in 3D except the top which is where it is needed.
Can anyone help?
-----------------------------------
Gerald Rogers
Revit 2015 |
This user is offline |
|
 | |
|
|
active

Joined: Fri, Sep 3, 2010
0 Posts
 |
In plan view, make sure the top of extrusion is below your cut plane. In 3D view, there could be a hidden section box cutting the top of extrusion. Uncheck ‘section box’ in view property.
|
This user is offline |
|
|
|
active
Joined: Thu, Jul 17, 2014
0 Posts
No Rating |
Ok, I am not sure how to do this. I maybe need to explain more. The extrusion is a generic model which I was creating to make a key legend. I was following this method;
This is my proposal for creating a Floor Finish Legend in Revit:In the family...1. New > Family > Generic model.rfa > Extrusion (make a square, something like 1'-6" x 1'--6") extrusion end: something such as 1". Finish extrusion.2. Types > Add parameter > name : Floor finish , type : Material ; Group under : Material and finishes. Type or Instance : Type.3. Types > New... (create Type A, Type B, Type C, ... etc) OK to close Family Types dialog box.4. Manage > Materials > select a material, such as "Default" > Duplicate > rename as Floor finish type A (or a descriptive name of your material). Surface hatch pattern > ... button > Model > New > Give a name to your hatch pattern > (either create one from scratch or use Custom to import one; if you import one, make a copy of your acad.pat file and modify the pattern files inside by adding this line of code: ;%TYPE=MODEL ; by doing this you will have model hatch patterns to choose from, such as stone, parket, etc.5. Repeat step for Floor finish type B, type C,...etc. OK. to close Materials dialog box.6. Types > Select family Type A , and assign the 'Floor finish type A' material to it. Then switch to family Type B and assign 'Floor finish type B', etc.. OK to close Family types dialog box.7. Modify > Paint > select Floor finish (param) ; it you go back to Types, swap types, apply, the material should change.8. Save file as Floor Finish types.rfa9. Load into project.In the Project...1. New > Legends > Legend > Floor Finish Legend > OK2. From the project browser, navigate to Generic Models. There will be a family called Floor Finish Types, expand it. It will have Type A, Floor Type B, Type C, etc...3. Drag Floor Type A to the legend. 4. Here you can continue dragging types B, C, etc. to the legend, or you can copy type A, and then change its type from the drop down menu of the options bar to be type B, C, etc. 5. Complete line work and notes as required.Please see attached image.Alfredo Medinainfo@planta1.com
I have done everything as explained above, except my materials only show on the elevation and bottom face of the extrusion and not the top face.
-----------------------------------
Gerald Rogers
Revit 2015 |
This user is offline |
|
|
|
site moderator|||
Joined: Tue, May 16, 2006
13079 Posts
 |
You need to assign a material to the extrusion - not paint. When you use paint, you have to pick every face of an object (JUST LIKE REAL PAINT!). I don't believe this is what you want but you don't tell us enough to know.
|
This user is offline |
|
|
|
active
Joined: Thu, Jul 17, 2014
0 Posts
No Rating |
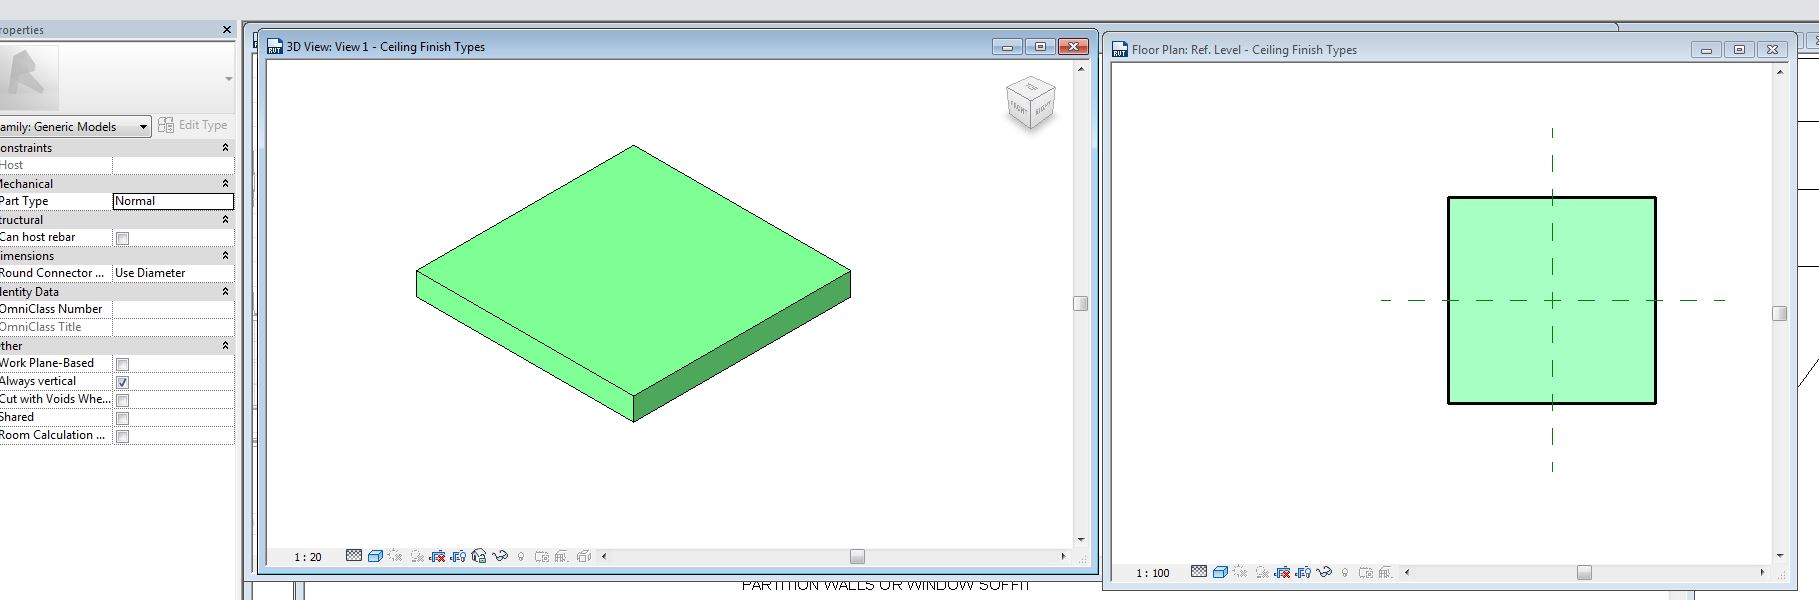
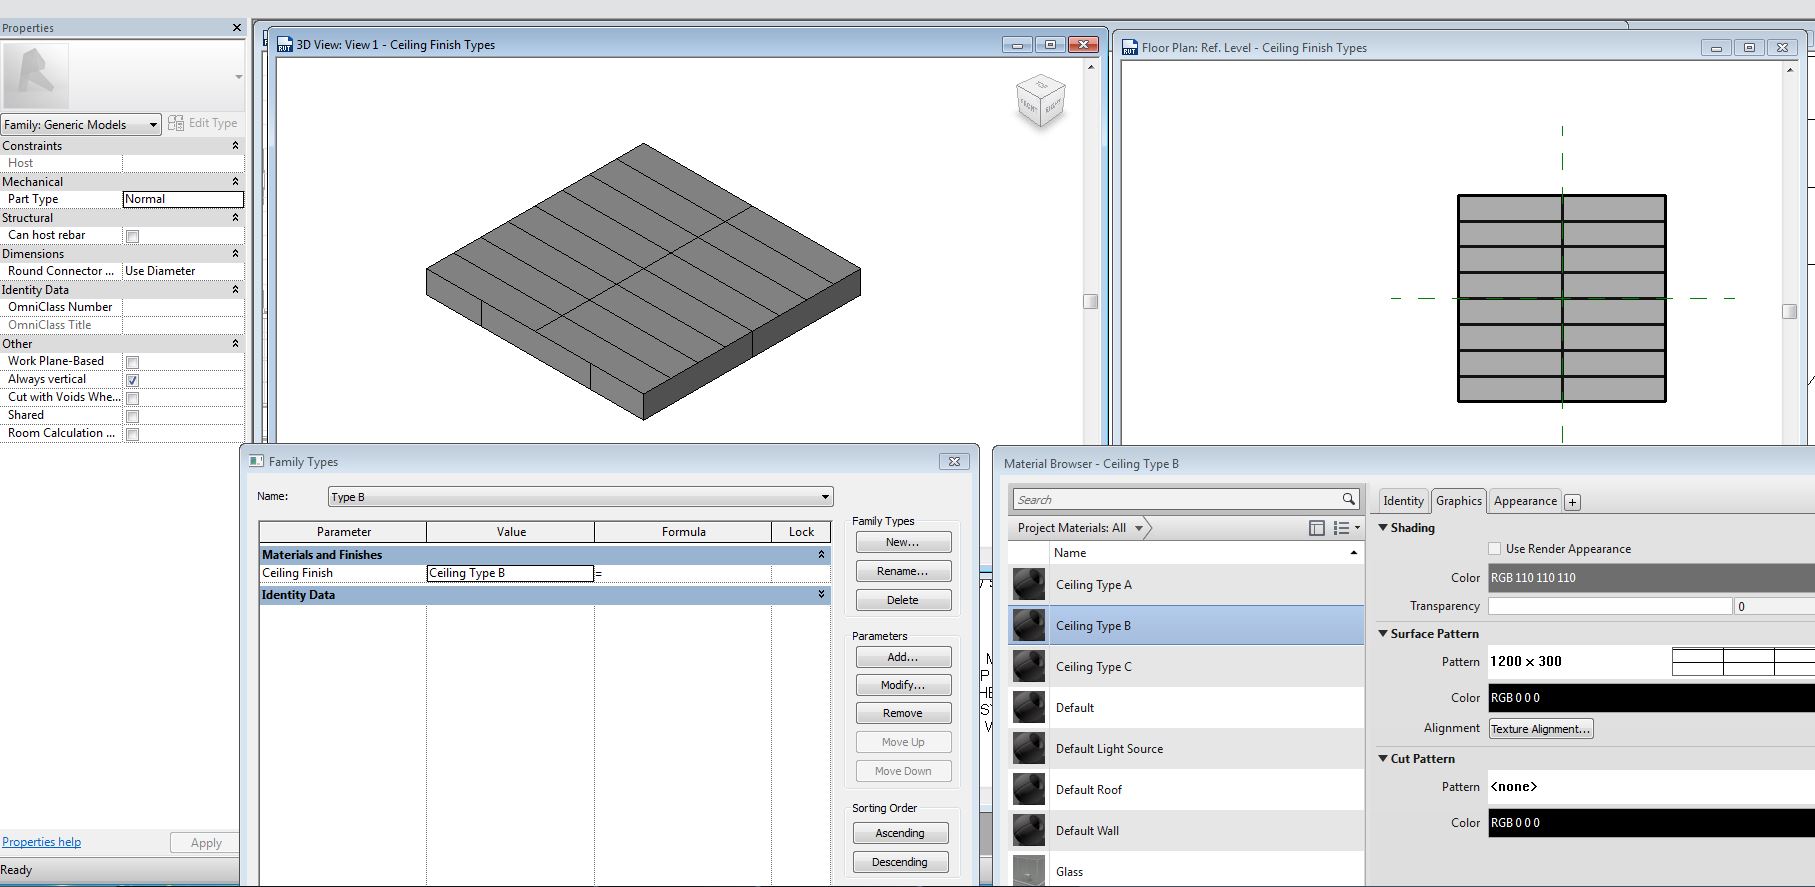
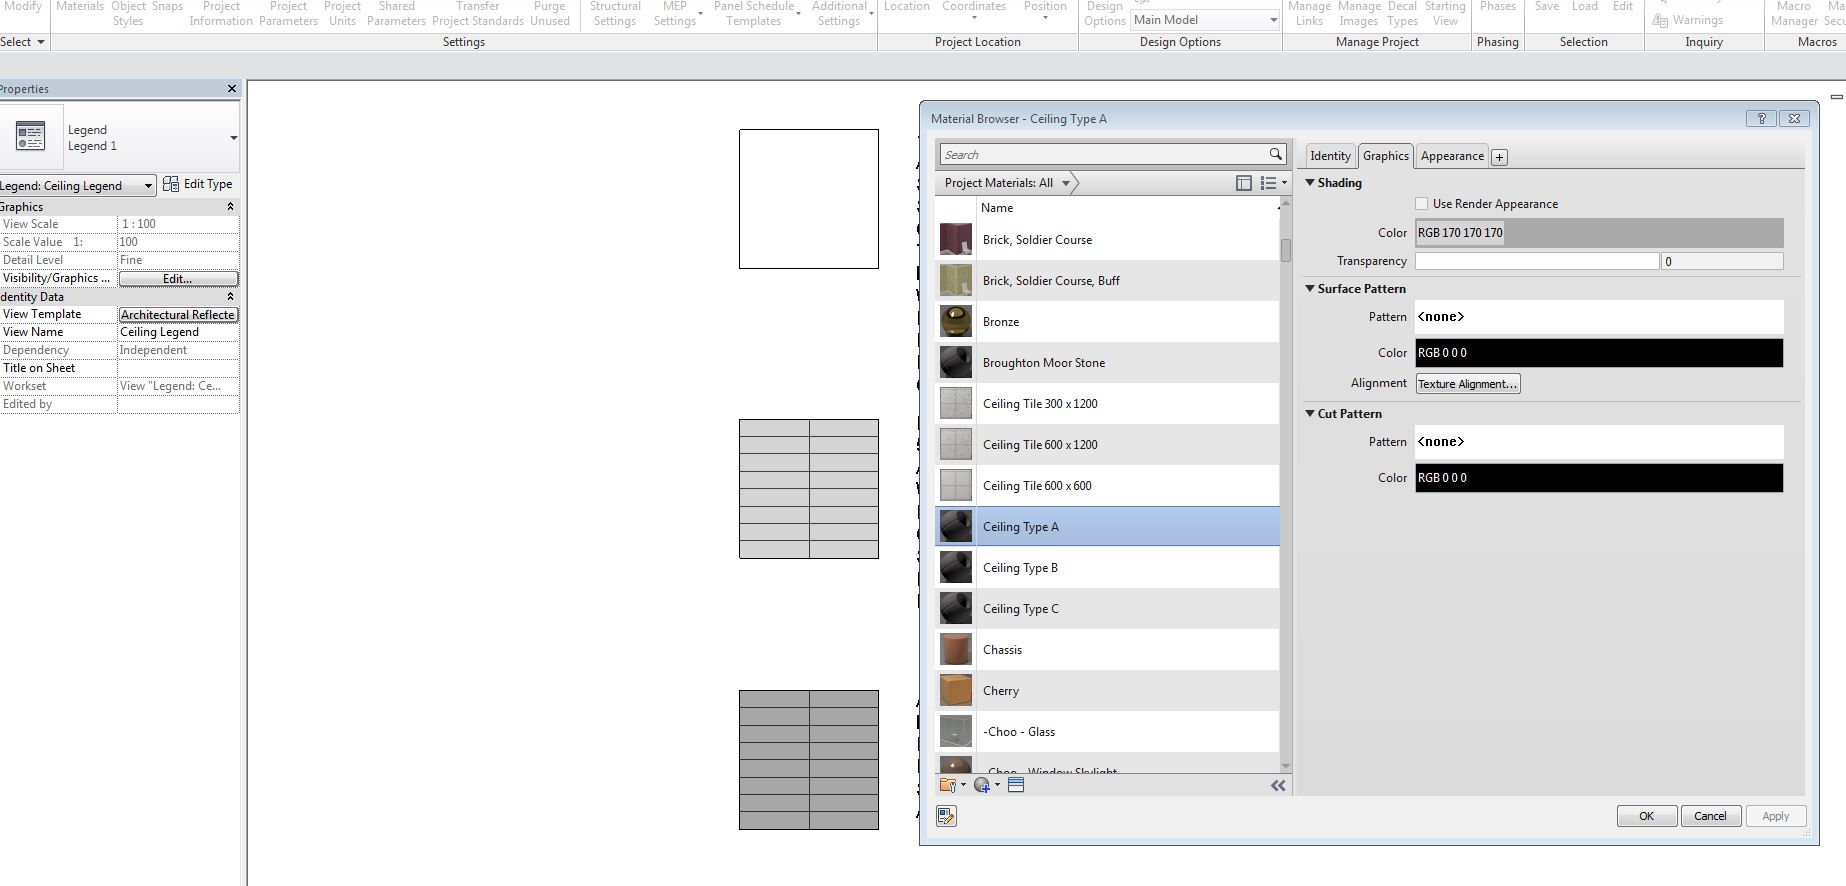
Ok, so it seems I had painted over the applied material, and can now see it. However, there seems another problem. When I assign a particular colour grey (170,170,170) it won't show in plan view. If I chance to another colour it is fine. Any ideas?
-----------------------------------
Gerald Rogers
Revit 2015 |
This user is offline |
|
|
|
active
Joined: Thu, Jul 17, 2014
0 Posts
No Rating |
see additional photo
-----------------------------------
Gerald Rogers
Revit 2015 |
This user is offline |
|
|
|
active
Joined: Thu, Jul 17, 2014
0 Posts
No Rating |
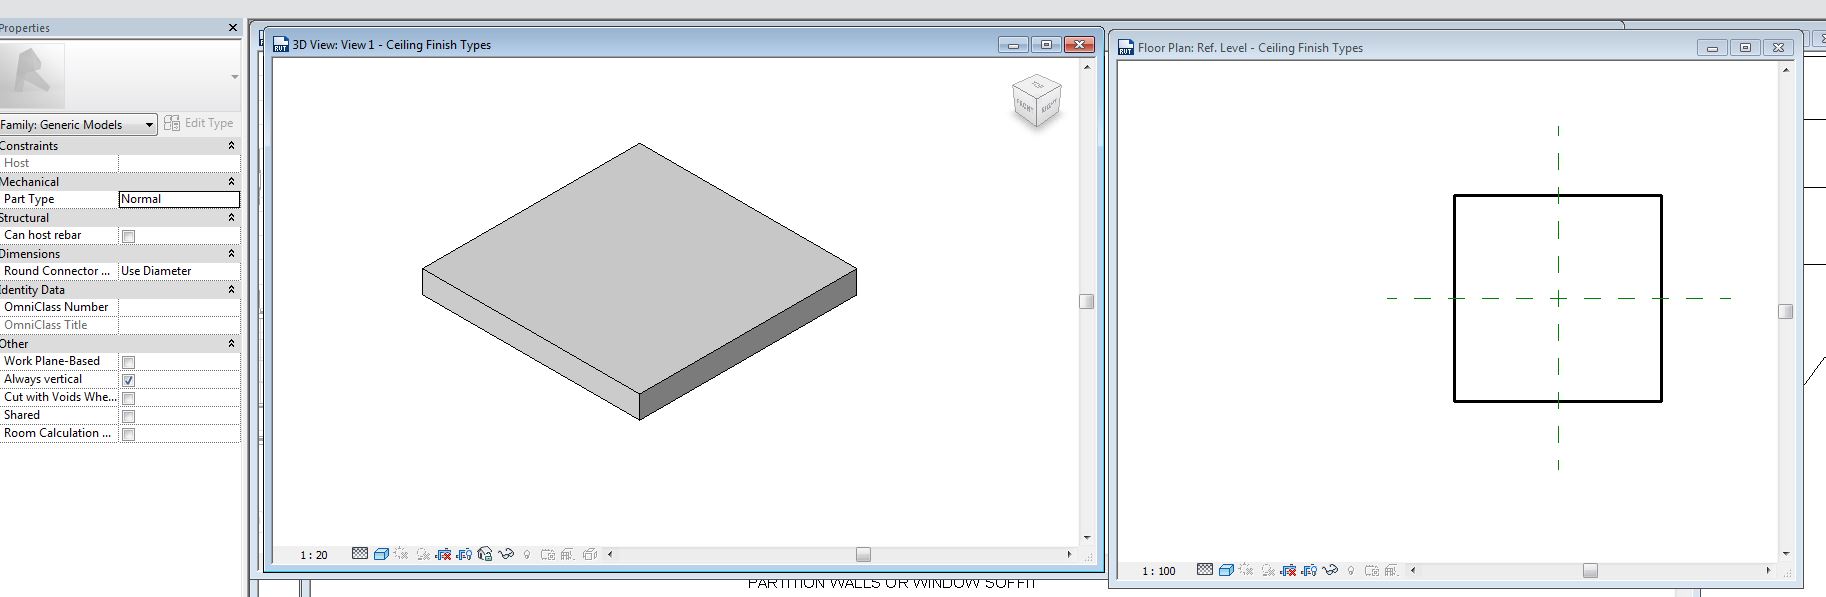
here is second ceiling finish option showing up in both 3D and plan view.
-----------------------------------
Gerald Rogers
Revit 2015 |
This user is offline |
|
|
|
site moderator|||
Joined: Tue, May 16, 2006
13079 Posts
|
THE PROJECT RULES - Once a family with assigned material is loaded into a project, the material is now defined in the project. Any changes in the family editor will no longer control that particular material in the project.
|
This user is offline |
|
|
|
active
Joined: Thu, Jul 17, 2014
0 Posts
No Rating |
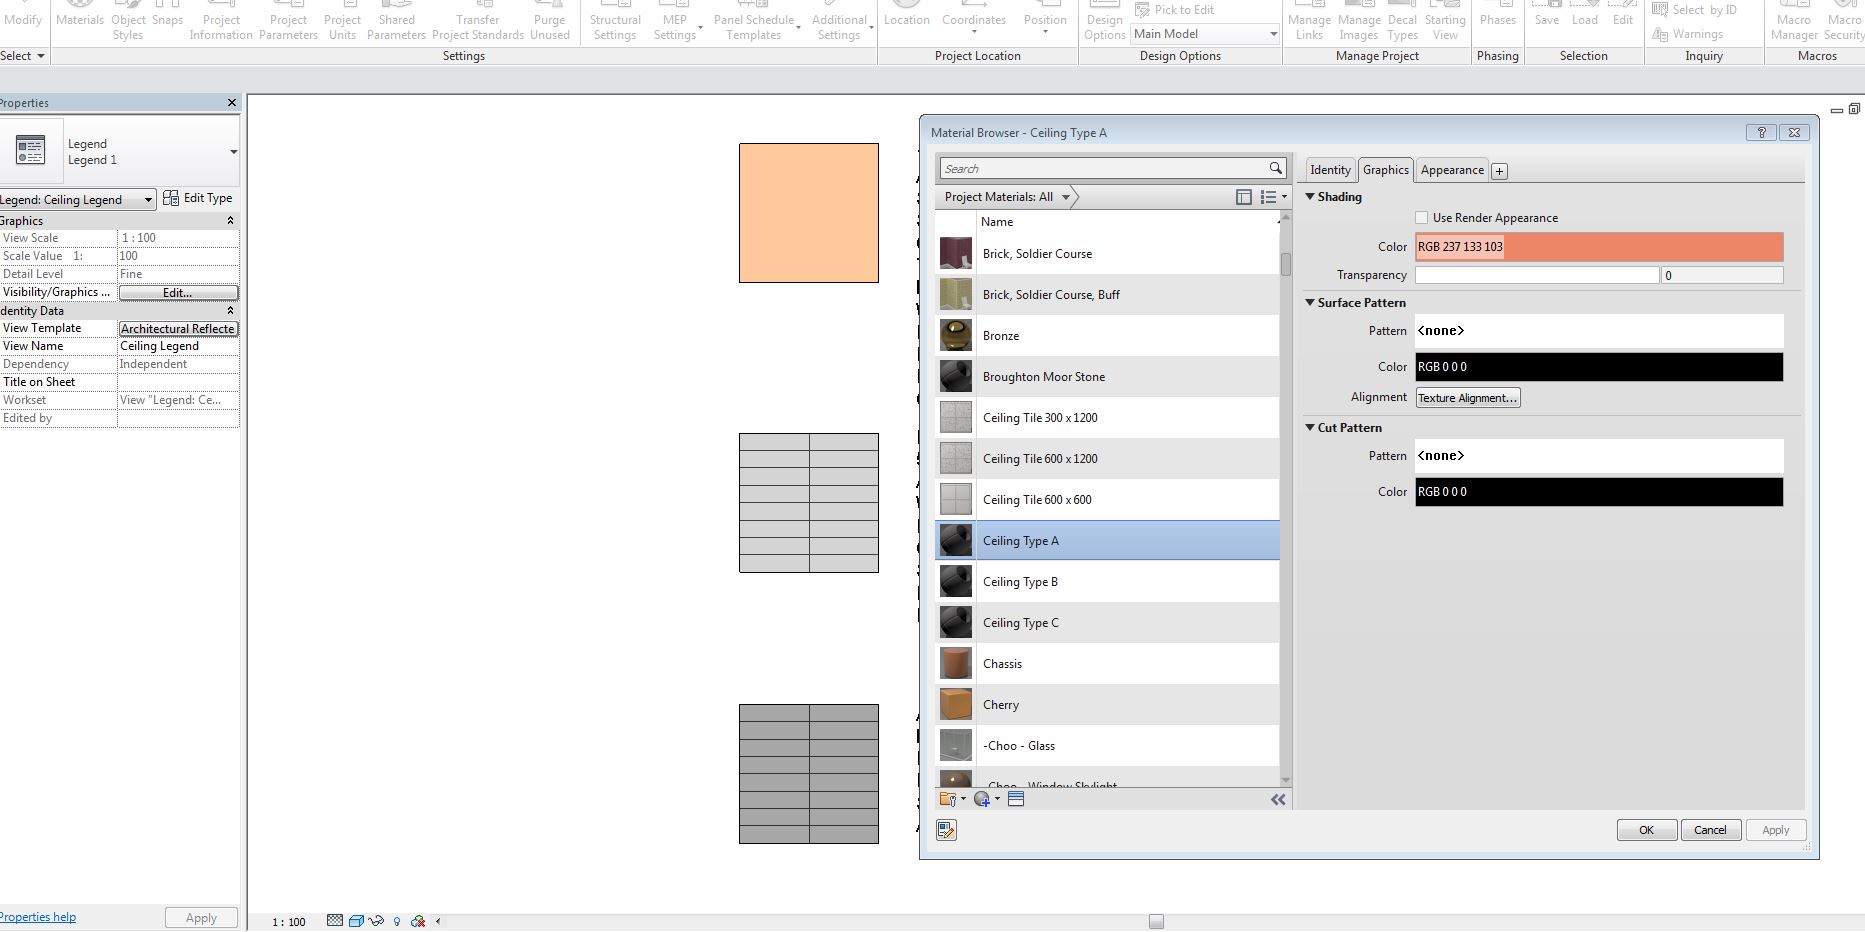
Okay, so I have the material in the project browser but still it won't appear correctly. Could there be some other graphic overide that I can't think of? The colours do appear a liitle lighter in the actual view whch is possibly making the grey appear white?, but I can't find the overide that is causing this.
-----------------------------------
Gerald Rogers
Revit 2015 |
This user is offline |
|
|
|
site moderator|||
Joined: Tue, May 16, 2006
13079 Posts
|
What are you trying to show us?
I see three ceilings in both images but only the properties for the top ceiling in both images and that color is changed for this one ceiling in both images. The grey for the first ceiling is 170/170/170 and in previous posts, the B ceiling is 110/110/110. Well of course it is different!
Explain what is wrong!!!!
Colors in Revit are just like in real world. They appear differently depending on view angle. So a wall may appear to be white straight on but grey when viewed at a glancing angle. These colors are a symbollic color only so don't think they will always be represented like the real world. Use a rendered view if you want that. NO SETTINGS to adjust/control this effect.
|
This user is offline |
|
| |
|
|
active
Joined: Fri, Sep 3, 2010
0 Posts
|
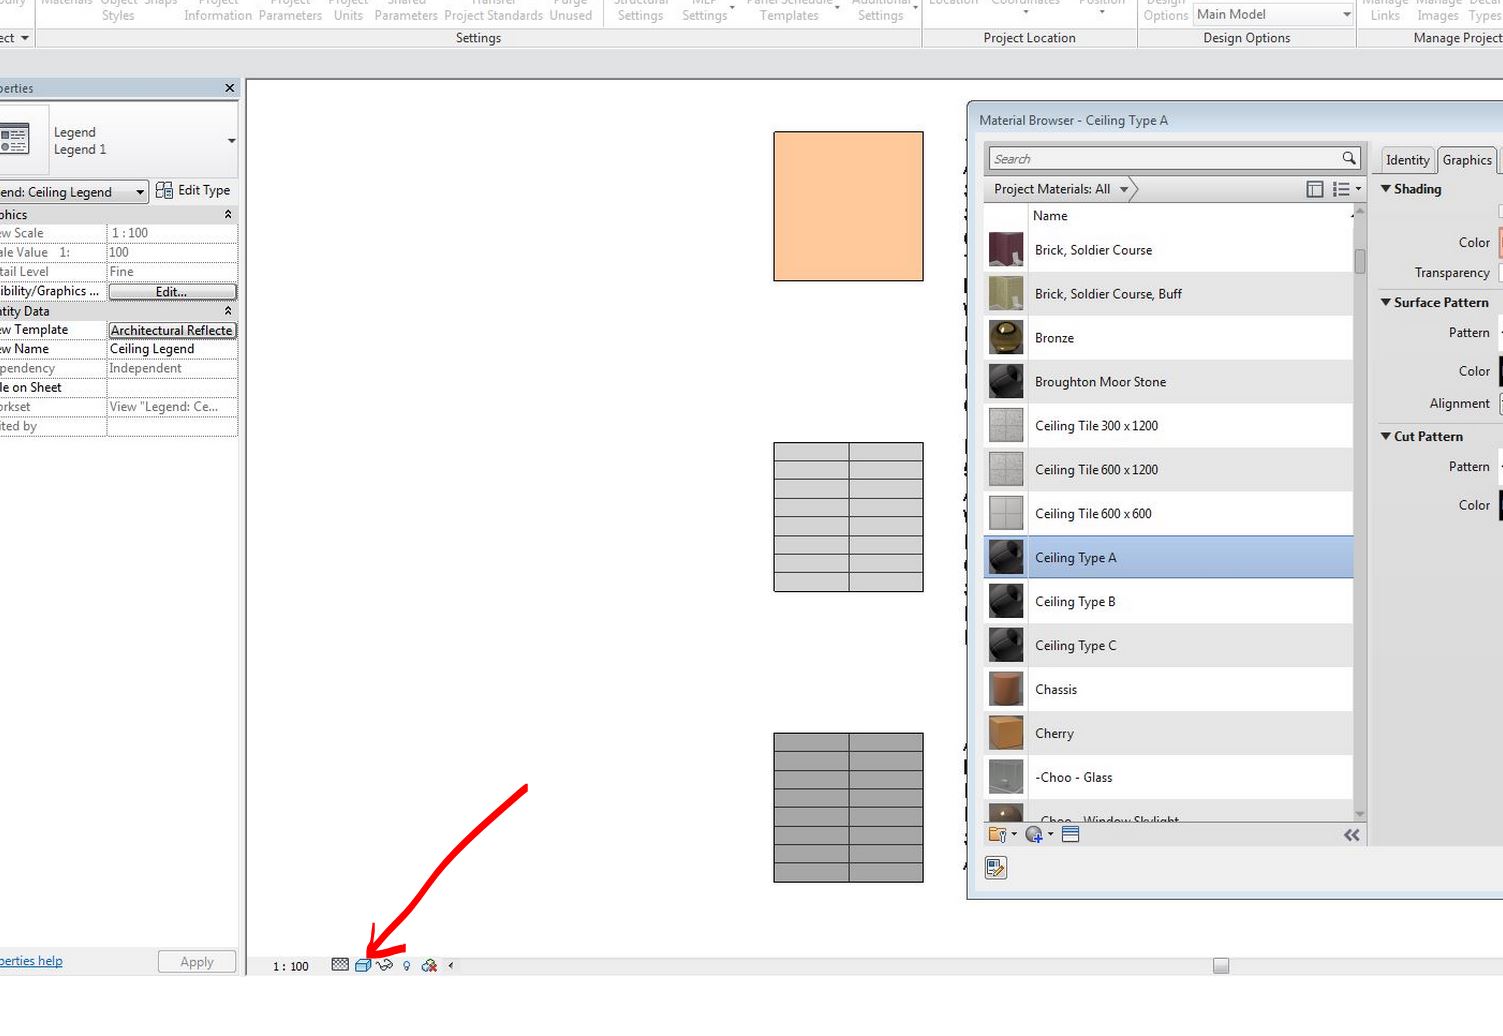
Change visual style to consistent colors.
|
This user is offline |
|
|
|
active
Joined: Thu, Jul 17, 2014
0 Posts
No Rating |
Thanks PIJPIWO you have solved the problem! The colours were not showing up properly so the grey appeared white while it was grey all the time!
Sorry posted twice for some reason.
Didn't think the first message posted.
The two images were to show that the top ceiling has a colour when the properties are changed to a colour but appears white when it should be grey.
Thanks also WWHub. My explanations of the problem were a bit lacking.
-----------------------------------
Gerald Rogers
Revit 2015 |
This user is offline |
|
|
|
Similar Threads |
|
Material Aligning on extrusion |
Revit Building >> Tips & Tricks
|
Fri, Sep 8, 2017 at 2:46:37 AM
|
0
|
|
Applying a Family Parameter |
Revit Building >> Technical Support
|
Tue, May 1, 2007 at 6:16:48 AM
|
3
|
|
Applying a material to a...donut. |
Revit Building >> Technical Support
|
Mon, Aug 6, 2012 at 2:01:16 PM
|
2
|
|
Mirror Material in Revit not Working |
Revit Structure >> Technical Support
|
Tue, Sep 23, 2014 at 5:49:41 AM
|
10
|
|
Massing - Applying Materials to Imported Geometry from Rhino-HELP! |
Revit Structure >> Technical Support
|
Sat, Dec 10, 2011 at 6:30:09 AM
|
8
|
|
|
Site Stats
Members: | 2161655 | Objects: | 23325 | Forum Posts: | 152479 | Job Listings: | 3 |
|