RevitCity.com Logo

Home  |  Forums  |  Downloads  |  Gallery  |  News & Articles  |  Resources  |  Jobs  |  FAQ  |  SearchSearch  |  Join  |  LoginLogin

Welcome !

82 Users Online (81 Members): Show Users Online - Most ever was 626 - Mon, Jan 12, 2015 at 2:00:17 PM


Forums

Forums >> Revit Building >> Technical Support >> railing wont update balusters.

Search this ThreadSearch this Thread | Page 1 of 1 |

Fri, Aug 23, 2013 at 7:15:42 PM | railing wont update balusters.

#1

Warchitect


active

Joined: Wed, Aug 20, 2008
318 Posts
4 Stars: 5 Votes


Please, someone help me figure out why I cant get the square balusters to raise up to the top railing. IM at a loss.

Thanks in advance.


Edited on: Fri, Aug 23, 2013 at 7:19:12 PM

Attached Images

123461_Capture.JPG

This user is offline

View Website

Fri, Aug 23, 2013 at 10:36:52 PM | railing wont update balusters.

#2

CDWdavid


active

Joined: Mon, Aug 4, 2008
153 Posts
5 Stars: 5 Votes


That looks weird. Was that a railing family?

Please up load it.

I think the attached file is what you want.


Edited on: Fri, Aug 23, 2013 at 10:51:22 PM

This user is offline


Sat, Aug 24, 2013 at 2:31:45 AM | railing wont update balusters.

#3

Warchitect


active

Joined: Wed, Aug 20, 2008
318 Posts
4 Stars: 5 Votes


check it. is it the balusters themselves?


edit: not sure why i cant upload it...


Edited on: Sat, Aug 24, 2013 at 2:32:13 AM

This user is offline

View Website

Sat, Aug 24, 2013 at 11:30:24 PM | railing wont update balusters.

#4

CDWdavid


active

Joined: Mon, Aug 4, 2008
153 Posts
5 Stars: 5 Votes


You might exceed the maximum size of the file allowed for upload.


You can open a blank new file, just copy and paste that railing only, which will cut the size of the file down to less than 2mb; then you’ll be able to upload it.


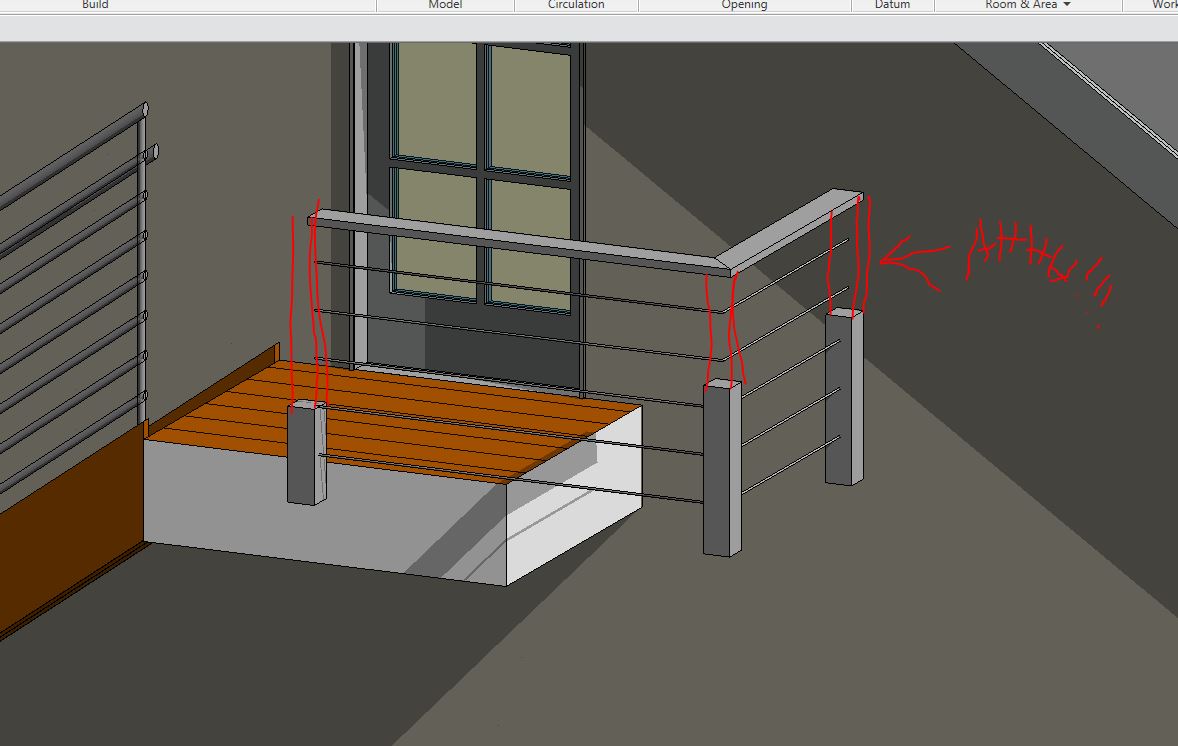
Please check the baluster placement, to see if all “Top offset” are zero. You might miss to select ““Top” to “Top Rail Element”, in step 3 below.


Here is the way how I created mine from scratch in Revit 2013:


1.       Start a new project without using any templates. Draw a railing, pick it and click “Edit Type” in “Properties”, click “Edit” for “Rail Structure”, or “Baluster Placement”; and you will find that no railing “Profile” neither “Baluster Family” in them. Now go to the Revit library, open families “Railings/Balusters/Baluster-Square”, “Railings/Supports/Support-Metal-Circular”, “Profiles/Stairs/Circular Handrail”, “Profiles/Stairs/Rectangular Handrail”, and load them into the project.


2.       Go back to the project, now you will see “Circular Handrail 1” “, and “Rectangular Handrail 2”x2” “. Right click “Circular Handrail 1” “, duplicate it, rename to “0.375” “, and double click it change the Diameter to 0,375”. Use the same way to create Rectangular Handrail 2”x4”, and change its dimension to 1.5”x3.5”. Now you can duplicate the 2” square baluster to create 3.5” square baluster, and you will see the “w1” changed to 5.5” automatically, which create voids at both ends of that baluster, which cuts the balusters per the slope of the stair.


3.       Now you can go back to the rail you drew in step 1, pick it, click “Edit Type”,  click “Edit” on the right hand column of “Rail Structure”, a new window will pop-up, for Rail 1 click “Profile” use pull down manual select 0.375”; then move your mouse to the left most and click 1, you will select the entire row, then use “Duplicate” tab on the bottom to create 9 of them, and change the Height to 4” increment. Now click “Edit” for Baluster, change “Baluster Family to Baluster-Square: 4”, “Top” to Top Rail Element. On the bottom of the same window, change the Baluster Family for all posts to Baluster-Square 4”.


4.       In the Family “Railings”, at the bottom, you will see “Top Rail Type” under it, rename the second “Top Rail Type” under it to “4x2”, which will be your top rail, double click it, in new pop-up window, move the mouse to the right hand column of “Profile”, select “Rectangular Handrail 4x2” from the pull-down manual. Now go back to pick the railing again, open the property window,  edit the “Rail”, on the bottom, click “Insert “, a “New Rail(1)” will be added, move it to the very top, rename it to “Top Rail”, set the height at 42”, then change the “Profile” to “Rectangular Handrail: 4”x2”.


Edited on: Sun, Aug 25, 2013 at 11:35:42 PM

This user is offline


Search this ThreadSearch this Thread | Page 1 of 1 |


Similar Threads

Thread/Thread Starter

Forum

Last Post

Replies

Balusters

Revit Building >> Technical Support

Tue, Aug 14, 2012 at 1:58:26 PM

1

More railing Q's...

Revit Building >> Technical Support

Tue, Jan 10, 2006 at 9:07:46 AM

0

RAILING MATERIALS ?? HELP

Revit Building >> Technical Support

Tue, Oct 7, 2014 at 6:18:39 AM

6

Glass Railing w/ perpendicular Baluster

Revit Building >> Technical Support

Sun, Feb 20, 2011 at 9:52:31 PM

3

Balusters / Railing / Stairs - Custom?

Revit Building >> Technical Support

Thu, Nov 9, 2006 at 7:53:09 AM

3

Site Stats

Members:

1988815

Objects:

22877

Forum Posts:

152178

Job Listings:

3

Sponsored Ads

Home | Forums | Downloads | Gallery | News & Articles | Resources | Jobs | Search | Advertise | About RevitCity.com | Link To Us | Site Map | Member List | Firm List | Contact Us

Copyright 2003-2010 Pierced Media LC, a design company. All Rights Reserved.

Page generation time: 0.3118

Login

User Name:

Password:

Remember Me  

Forgot Password?

Search Forums

Advanced Search

Search Forums

Advanced Search


Clear Highlights


Clear Highlights