|
|
|
Home | Forums |
Downloads | Gallery |
News & Articles | Resources |
Jobs | FAQ |
| Join |
Welcome !
|
6 Users Online (4 Members):
Show Users Online
- Most ever was 626 - Mon, Jan 12, 2015 at 2:00:17 PM |
Forums
|
Forums >> Revit Building >> Technical Support >> exterior wall finish
|
|
|
active
Joined: Mon, Sep 19, 2005
47 Posts
 |
Hi
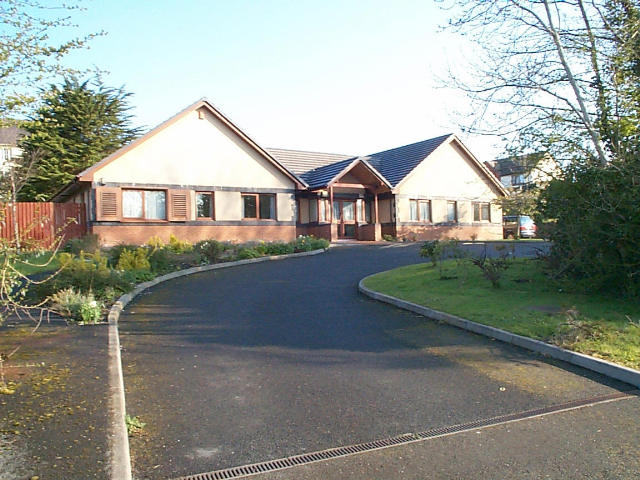
I am currently drawing the building in the attached photo. I am quite new to revit and would like to know how to achieve the effect of the exterior wall in the image. How can you modify the wall to have a brick finish at the bottom and then a paint finish at the top. I know it can be done by placing a brick wall ontop of a paint finished one but thought there may an easier way.
Also I have never used revit to design the area around a building. Some help in starting to create a siteplan and draw in roads, parking bays, shrubery, etc, would be appreciated. Also help in designing the contours of the land around the builing would be appreciated.
Thanks
Post edited on 2005-11-18 05:55:13
|
This user is offline |
|
 | |
|
|
active
Joined: Fri, Sep 16, 2005
9 Posts
No Rating |
Hi Nathan,
To create the wall structure you need, you will have to create a vertically compound wall. That's a fancy way of saying that 2 finish components are stacked one on top of the other.
Go to the Wall Element Properties window.
Click on the Edit/New button.
Click on the Preview button if it is not open.
Click on Duplicate to define a new type of wall.
Click on Edit next to the Structure parameter.
Create your basic wall type with the bottom finish assigned to the exterior face.
Set your wall sample height to the appropriate height.
Use the Split Region tool to split the wall at the height of the bottom material.
Create a new finish layer with a material component to mimics the top portion of your wall.
Click on Assign Layers and click on the top portion of the wall while the layer is selected in the list.
That should do it. This same technique can be used to create a solider course of bricks. Good luck.
Sean
|
This user is offline |
|
|
|
Similar Threads |
|
exterior finish error |
Revit Building >> Technical Support
|
Tue, Jun 16, 2009 at 1:22:12 PM
|
2
|
|
exterior finsh below zero |
Revit Building >> Technical Support
|
Sun, Apr 11, 2010 at 10:13:36 AM
|
5
|
|
Exterior finish on wall not exterior enough... ? |
Community >> Newbies
|
Fri, Jun 3, 2011 at 8:44:28 PM
|
4
|
|
WALL SHEATHING AND EXTERIOR FINISH |
Revit Building >> Technical Support
|
Mon, Jun 19, 2006 at 10:05:55 AM
|
2
|
|
Extending an exterior finish on a wall |
Revit Building >> Technical Support
|
Mon, Mar 6, 2006 at 5:38:23 PM
|
1
|
|
|
Site Stats
Members: | 2161655 | Objects: | 23325 | Forum Posts: | 152479 | Job Listings: | 3 |
|