Forums
|
Forums >> Revit Building >> Technical Support >> What is the best way to build this complicated FLOOR PATTERN???
|
|
|
active
Joined: Fri, Oct 22, 2010
86 Posts
No Rating |
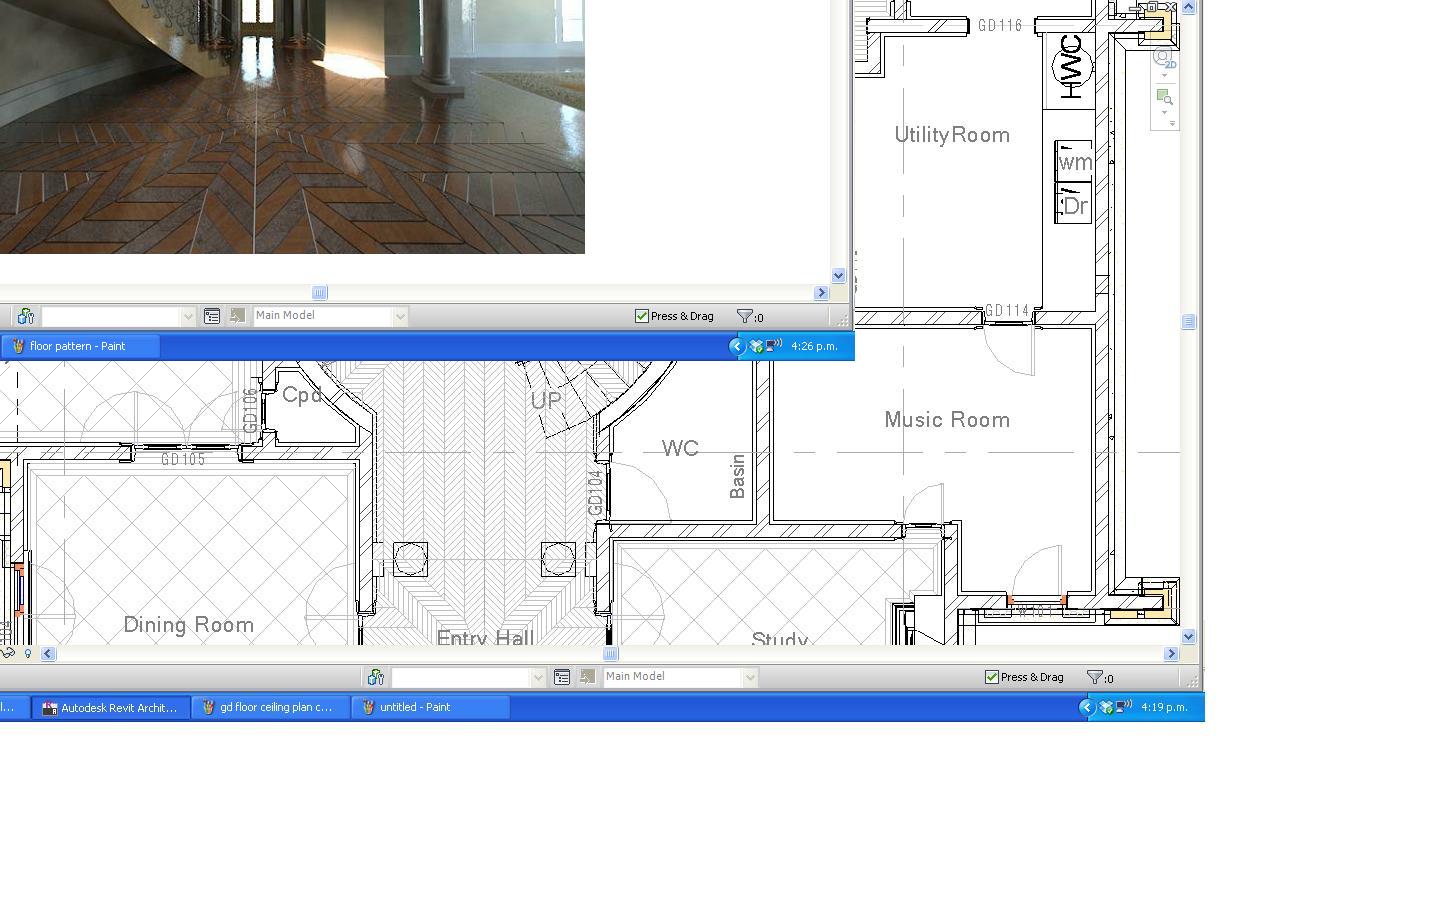
Hi there - I've built this floor pattern already, but the way I did it was so slow that I wonder if anyone has a more efficient way of building it. The first way I built this pattern, was by creating a series of thin tiles, that were the shapes as shown in the attachment. This worked fine, but was slow when I copied and pasted each tile. [Each tile was loaded with info i.e. material etc - but seems strange it was so slow]. I've done some searching on the forums too - and see lots of people suggesting to use filled regions or split face. Neither of these are suitable for this (as I see it). Basically, I am wondering if someone can suggest a way in which I build a series of the tiles, before mirroring them (as the patterns can obviously all be mirrored). I need to get a high quality render, with realistic woodgrain - there can be two types of materials used (to show up the pattern and give some realistic feel), not like the original one where the two wood colours are completely different. Thanks to anyone that can assist! Much appreciated....
|
This user is offline |
|
 | |
|
|
active

Joined: Mon, Jul 13, 2009
273 Posts
 |
create a pattern up down stroke... then align the lines. It must be model pattern, and you have to do it with multiple floor slabs. Seek for "pattern" in this same forum, the answer is here.
|
This user is offline |
|
|
|
active
Joined: Fri, Oct 22, 2010
86 Posts
No Rating |
Hi, thanks for response. I'm sorry but I don't understand -'create a pattern up down stroke' - what is this? I also searched for 'pattern' in the forum, but there are so many and most explain about filled regions or split faces. if you can help that would be great, thanks
|
This user is offline |
|
|
|
active
Joined: Fri, Oct 22, 2010
86 Posts
No Rating |
It could be you are talking about me using a model pattern i.e. 180, -0, -0, 12.75, 6, 3, -2.5, 3.5, -1.5, 4.5, -2 180, -3, -0.25, 12.75, 6, 2.5, -9.5, 2, -3 180, -9, 0.375, 12.75, 6, 1.5, -15.5 -90, -0, -0, 6, 4.25, 5.75, -18.25 I've also tried figuring this out by I'm way out of my depth and the pattern didn't work as I needed it to (my lack of intelligence) so would like to avoid it, thanks
|
This user is offline |
|
|
|
active

Joined: Thu, May 28, 2009
829 Posts
 |
The hatch in this case doesn't need to be complicated at all. looking at your attached image, it looks like there is one narrow hatch, and one slightly wider hatch. They only need to be simple horizonal-lined model hatches, which you can create within revit. one with a 6" spacing, one with 8", or something like that. The fun part is going to be using "split face" to break up for floor into those different regions. Then, painting with your hatched red and black materials. (you'll need 4: thin red, thick red, thin black, thick black) And now the fun part is: To rotate a hatch on the surface, all you have to do is hover over a hatch line, and hit tab, and you can select it. Once you have one line of a hatch selected, you can move, align, and rotate the whole pattern within that region. Hope that helps. edit: oh. well, the alternating red/black would be difficult. but you can achieve the hidden line paterning easilly as described above.
Edited on: Tue, Mar 15, 2011 at 7:17:01 PM
|
This user is offline |
|
|
|
Similar Threads |
|
Complicated stair |
Revit Building >> Technical Support
|
Fri, Oct 17, 2008 at 10:34:26 AM
|
3
|
|
Floor pattern not showing up when the pattern is model pattern |
Revit Building >> Technical Support
|
Fri, Nov 3, 2023 at 9:11:59 PM
|
0
|
|
Floor pattern -- masking floor pattern |
Community >> The Studio
|
Mon, May 23, 2005 at 11:51:48 AM
|
5
|
|
Surface Pattern on Modified Floor - No Skewing for Floor Plans |
Revit Systems >> Technical Support
|
Mon, Sep 12, 2016 at 7:45:11 PM
|
3
|
|
Floor patterns diff directions same pattern. |
Revit Building >> Technical Support
|
Sun, Sep 27, 2009 at 4:57:09 PM
|
1
|
|
|
Site Stats
Members: | 2161655 | Objects: | 23325 | Forum Posts: | 152479 | Job Listings: | 3 |
|