|
Forums >> Revit Building >> Technical Support >> Varying eave heights on roof
|
|
|
active
Joined: Mon, Dec 15, 2008
57 Posts
No Rating |
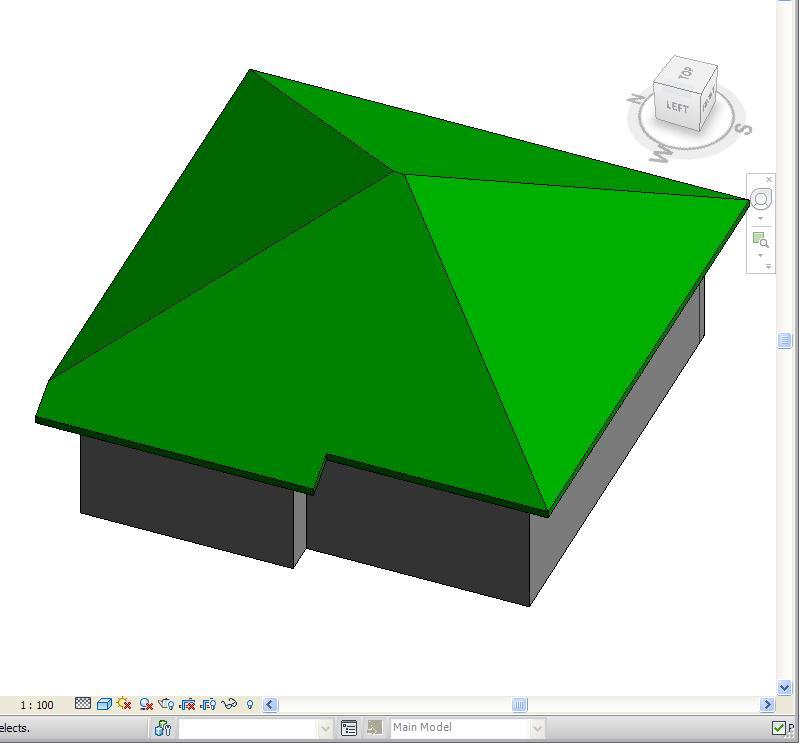
I am tryingto draw an existing roof (as shown in the attached drawing) with an area of lower eave height, (see the roof without walls - which has a nasty junction in the roof plane), but with a two cut plumb eave condition (as on the roof with the walls). If I try to change the eave condition or make the roof with that eave condition Revit "cannot make roof" . The overhang is fairly consistently 600mm. I have tried changing it around to tweak the eave behaviour, but that didn't work. I have tried varying whether the footprint is generated by picking walls and drawing lines but this has not helped. I referred to a video tutorial on how to get rid of this varying eave height when you want to create different size overhangs, which is rather the opposite of what I want to do, but possibly Revit 2011 doesn't work that way, because I could not reproduce the behaviour. (Tutorial found on this thread: http://www.revitcity.com/forums.php?action=viewthread&thread_id=3400) I cannot see how to do it as a joined roof either, because there is only one plane with the different eave height.
|
This user is offline |
|
 |
|
|
|
active
Joined: Mon, Dec 15, 2008
57 Posts
No Rating |
-attempting to attach file again-
|
This user is offline |
|
|
|
active
Joined: Mon, Dec 15, 2008
57 Posts
No Rating |
<bump> Any suggestions please?
|
This user is offline |
|
|
|
active
Joined: Mon, Jul 5, 2010
28 Posts
No Rating |
I don't have time to download the file (a pdf would be easier, I could look at that for you), but a roof with one plane, one eaves overhang and different eaves height is impossible isn't it? Are you sure that's how the existing roof has been built? Also by one plane do you mean a skillion? What sort of roof is it?
|
This user is offline |
|
|
|
active
Joined: Mon, Dec 15, 2008
57 Posts
No Rating |
The roof does not have only one plane, nor only one eaves overhang: the different height eaves overhang only occurs in one plane of the roof. I pared down the file before attaching it but here is a pdf as well.I hope this makes my question more clear. You can see that to acheive something close to the actual roof, on the roof on the right there is a nasty junction in what should be a single plane of the roof. The roof on the left , which has the two cut eave edge won't allow me to have the eave at different heights, so does not come out correctly. When I refer to the single roof plane, I mean that within the entire roof with several planes, there is a single plane of roof which has two eaves heights, therefore I cannot add the lower eave height portion of the roof as a joined roof, because you cannot join two roofs in the same plane. Or can you? Thanks
|
This user is offline |
|
|
|
active
Joined: Mon, Jul 5, 2010
28 Posts
No Rating |
Okay, here's the process (I hope this makes sense). Think of the roof as having 2 different overhang offsets. Let's say the main overhang for most of the roof is 600mm and the bit you want to extend is 1200mm. Draw the roof footprint using the "Pick Walls" command with an offset of off 600mm for all sides except the one with the long offset. On that one side change the offset to 1200mm and pick the wall. Then draw in a line offset 600mm from the face of the wall on the troublesome side and use the align eaves tool to align it's height with one of the 600mm eaves lines from before. Then connect that last line and your 1200mm eaves line with another line and specify that this short line not "define slope". That should do it. If this is unclear at all let me know and I will do it in a step by step post with some simple pdf's or something like that.
|
This user is offline |
|
|
|
active
Joined: Mon, Dec 15, 2008
57 Posts
No Rating |
Ok I have tried what I understand from that, with a simple Plumb cut Rafter Roof and it worked.(see attached) Thank you. Then I tried to do it with a Two cut-Plumb rafter cut and it didn't work. :-(
|
This user is offline |
|
|
|
active
Joined: Mon, Jul 5, 2010
28 Posts
No Rating |
I'm not sure what a 2 cut plumb rafter is!?!?! Sorry. Do you mean that you have 2 of these eyelids (that's what my old boss used to call these eave extension roofs) in the one plane or something else?
|
This user is offline |
|
|
|
active
Joined: Mon, Dec 15, 2008
57 Posts
No Rating |
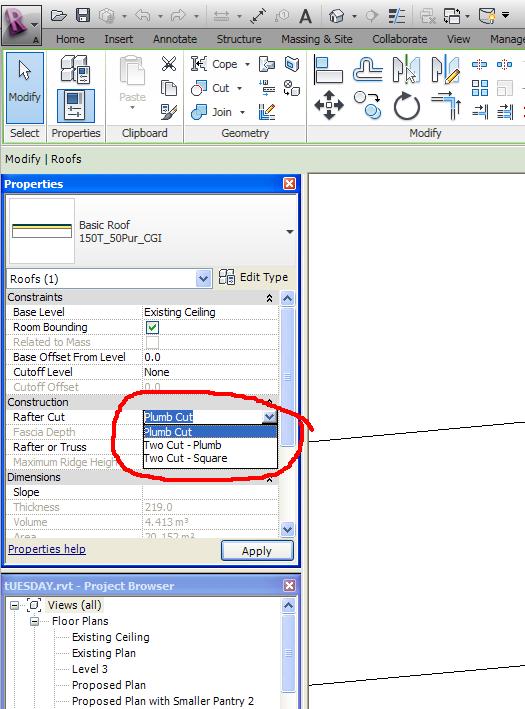
The two cut plumb rafter is an option where the eave finishes on a vertically cut plane and also has a horizontally cut plane that trims the eave to give a thinner edge to the eave than the roof thickness. See: http://docs.autodesk.com/REVIT/2011/ENU/filesUsersGuide/WSfacf1429558a55de124d854ff550a7db6-7fff.htm
|
This user is offline |
|
|
|
active
Joined: Mon, Jul 5, 2010
28 Posts
No Rating |
Oh I get it now. That's not something I have used before but I am surprised that the process that i suggested didn't work. I guess you only want to show that 2 cut option at the end of the eyelid don't you. In that case I think you would have to draw the eyelid itself as a separate roof and try to join them because that would be a completely different roof type wouldn't it.
|
This user is offline |
|
|
|
|
|
active
Joined: Mon, Jul 5, 2010
28 Posts
No Rating |
You know what might be possible. Do the roof the way I said at first and toy with openings, like you use to cut holes in floors and cut eaves overhangs off and that sort of thing. Or if you only need to show the difference in detail section, pull your section through the roof and use the cut profile tool on the modify tab to shape the truss ends to the shape you want.
|
This user is offline |
|
|
|
active
Joined: Mon, Dec 15, 2008
57 Posts
No Rating |
Yes it is strange (and very annoying) that it doesn't work. I suspect it is something to do with the cuts to sections of eave that define the pitch meeting those that don't and creating some errors there. I need to show that two cut plumb detail to all the eaves except the short pieces that do not define the pitch. I may end up having to do a fudge as you describe. Frustrating... Thank you for your help.
|
This user is offline |
|
|
|
active
Joined: Mon, Jul 5, 2010
28 Posts
No Rating |
Hang on, do you mean that all the truss tails, for the whole roof, are to be "2 plumb cut" for the second option?
|
This user is offline |
|
|
|
active
Joined: Mon, Dec 15, 2008
57 Posts
No Rating |
The ends of the rafters are two cut plumb for almost all rafters. The only edges that are not 2 cut plumb are those two short sections of eave that run up from the lower height eave to the higer eave (which in Revit terms do not "define slope" These sections are simply cut plumb as they are effectively "barge boards" at the full thickness of the roof. They would be complex to cut as a two cut because the soffit is not horizontal but sloping following the roofline. These sections are simply cut plumb as they are effectively "barge boards" at the full thickness of the roof. They would be complex to cut as a two cut because the soffit is not horizontal but sloping following the roofline.
|
This user is offline |
|
|
|
active
Joined: Mon, Jul 5, 2010
28 Posts
No Rating |
Wow, I tried it to and I can't believe it doesn't work. That's a massive glitch!! Nice chatting with you today. All the best with your difficulties.
|
This user is offline |
|
|
|