|
|
|
Home | Forums |
Downloads | Gallery |
News & Articles | Resources |
Jobs | FAQ |
| Join |
Welcome !
|
9 Users Online (7 Members):
Show Users Online
- Most ever was 626 - Mon, Jan 12, 2015 at 2:00:17 PM |
Forums
|
Forums >> Revit Building >> Technical Support >> Dimension
|
|
|
active
Joined: Tue, Mar 18, 2008
6 Posts
No Rating |
I know it shouldn’t be this hard to figure out how to place the linear dimension on a non-orthogonal wall. I have been trying different options but it just doesn’t let me do it. Or error window pops up saying, “The References of the highlighted Dimension are no longer parallel.” Need help. Thank you.
|
This user is offline |
|
 | |
|
|
active
Joined: Thu, Sep 13, 2007
42 Posts
No Rating |
I am assuming you are talking about an angled wall such as a bay area; if so, I have found the easiest "work around" to be using detail lines, from the drafting tab, and then using your linear dimension to complete your task. Refer to the attached image: Step 1-Using the thinnest line setting, draw short line segments along the wall where you are going to dimension. Step 2-Using the Trim/Extend tool, fillet these lines to create an intersection. Step 3-Dimension your wall using a LINEAR dimension. Hope this helps. Jim H.
|
This user is offline |
|
|
|
active
Joined: Thu, Sep 13, 2007
42 Posts
No Rating |
Forgot to add this little piece of information. Do not erase the short detail lines; with them set at the thinnest setting, they will not show up when you print. If you erase them, your dimension will have nothing to reference. Jim
|
This user is offline |
|
|
|
site moderator|||
Joined: Tue, May 16, 2006
13079 Posts
 |
You don't really need the short detail lines. Start your dimension command - hover over the intersection you want to start from and keep hitting your tab key until you see a small dot at that point, do the same at the other end and you have your dimension. If you are dimensionioning from what appears to be two parallel lines (objects) but they are no longer parallel and they should be, I suggest you add a crossing line with add a couple of angle dimensions. Then click on the object that is out of sync and it's angle will turn blue - set it to match the other one and the objects will be parallel.
|
This user is offline |
|
|
|
active
Joined: Tue, Mar 18, 2008
6 Posts
No Rating |
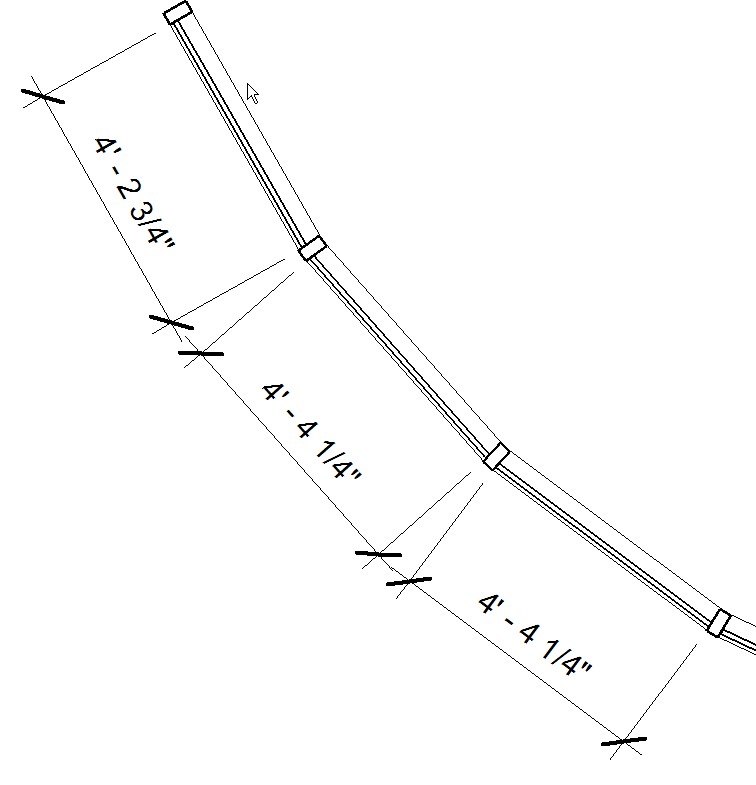
i am talking about dimensioning this kind of curved curtain wall.
|
This user is offline |
|
|
|
site moderator|||
Joined: Tue, May 16, 2006
13079 Posts
|
Dimensioned according to my last post. If you want something else ... you can figure it out from there.
|
This user is offline |
|
|
|
Similar Threads |
|
Activate Dimension |
Revit Building >> Technical Support
|
Tue, Dec 13, 2011 at 12:53:44 PM
|
3
|
|
Dimension strings not adding up to the total length dimension string (2017) |
Revit Building >> Technical Support
|
Fri, Mar 23, 2018 at 1:33:58 AM
|
1
|
|
Dimension Text [ 1 2 ] |
Revit Building >> Technical Support
|
Tue, Jul 8, 2008 at 9:15:07 AM
|
18
|
|
"EQ" dimension on either sid eof a fixed dimension [ 1 2 ] |
Revit Building >> Technical Support
|
Sun, Aug 24, 2008 at 12:08:50 PM
|
15
|
|
Dimension Question |
Revit Building >> Technical Support
|
Wed, Nov 23, 2011 at 11:41:34 AM
|
10
|
|
|
Site Stats
Members: | 2161655 | Objects: | 23325 | Forum Posts: | 152479 | Job Listings: | 3 |
|